
The Overlay function is available on the Takeoff Tab.
You can compare any two revisions of a Plan using the revision tabs at the bottom of the Takeoff Window. After turning on Overlay if you are viewing a Page that has multiple revisions you tell the program the two revisions you want to compare. The "Base Image" is the oldest revision the "Overlay" is the newer revision.
The program color-codes the differences between the base and overlay plans - Blue (the base image) is NEW Red (the overlay) is DEAD - meaning that objects that are colored in Blue exist on the newer plan but not the original and those in Red have been removed (the objects exist on the older plan but not the Overlay). Parts of the two plans that are identical/unchanged become greyed-out or appear slightly purple (blue plus red equals purple).
The Overlay function is designed to show you differences in two drawings (two revisions of a Plan) at reasonable zoom. If you zoom in extremely closely the program highlights the changes - even differences in pixels that do not match are color-coded.
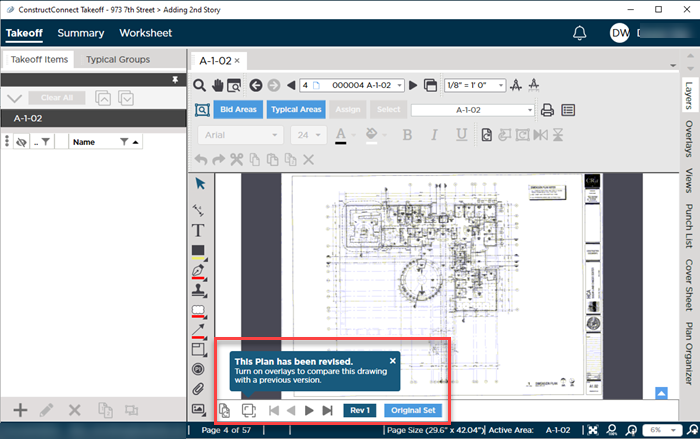
Revision Set Notification
When a Revision is added to a Page the first time you navigate to that Page in the Takeoff Window you'll be notified of the Revsion:
Using Overlay
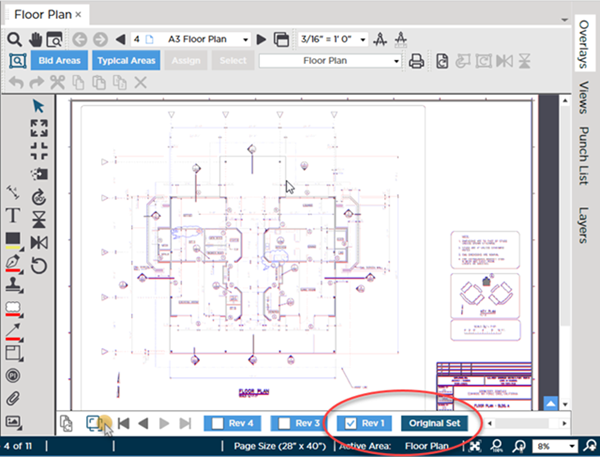
On any Page that contains multiple Revisions turn on the Overlay function by clicking the Overlay button ( - next to the Revision Set Navigation buttons).
By default the Revision you were viewing is compared to the next newer revision (the revision tab to the left of the selected/in-view revision). If you are viewing the latest (current) Revision selected - there is nothing newer to which it can be compared. Many times the revision in view is the most-current (leftmost tab) so you have to select an older revision before you will notice anything.
In the example below we clicked on the Original Set and the program assumed we wanted to compare it the newer revision (Rev1).
What is the program doing here? What's with all the purple?
What you are seeing is pixel-by-pixel comparison between the plan in the Original Set and the plan in Rev 1. Overall at a full-page zoom most of the comparison appears purple-grey.
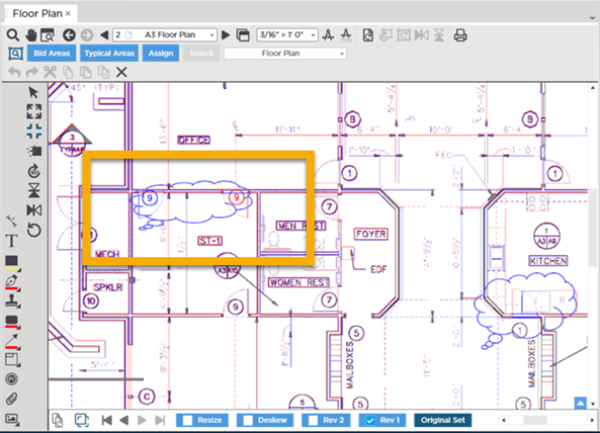
Notice in the highlighted region below there are some objects that definitely appear blue and red. At full-page zoom we can identify these changes between the plans and then zoom in to see the changes in detail.

(Remember "new" is blue and "dead" is red.)
If we zoom in a bit we can see the changes. The purple is a little distracting because we have not aligned the Overlay so that the two images match up better but we can still identify that a door was moved from one end of the wall to the other.
We cover aligning and making other adjustments to the overlaid plan to reduce the purple in the next few articles.
See the articles that follow for ways of adjusting your Overlay to make discerning additions and subtractions easier. For now we just want you to get the hang of comparing Revisions.
For whichever revision tab is the 'active' tab (dark blue) you can select one newer revision to compare it to.
Because every revision is newer than the Original Set we can compare the original version of this plan to each Revision. If we select "Rev3" we can only compare it to "Rev4" and as we mentioned earlier if we are viewing "Rev4" (Rev4 is dark blue) we cannot Overlay a revision because there is no newer Plan. Coordination Overlay is still available however and we cover that in the next article.
The Overlay Pane
Every possible Revision that can be Overlayed to the current "base" plan is shown in the Overlay list. The Overlay Pane also is where you can select a Construction Coordination Overlays (next article).
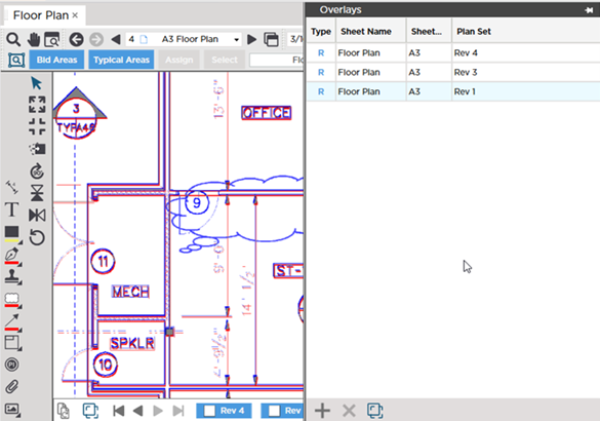
You can quickly switch comparisons by clicking on different Overlays in the Overlay list although the Overlay Panes takes up a little screen real estate and if you are just comparing revisions of the same Plan it is easier to use the tabs at the bottom of the Takeoff Window.
Now we show you how to compare different Plans images/drawings that are not revisions of the current Page.
Related Articles