
Now that you've selected which objects you want to percent, you set the percent complete using one of two methods explained below.
Each selected object shows a % Complete box next to it, as you set "percent complete", this box updates and the objects change color (from blue to green, orange, or red, depending on how the percent complete compares to budget).
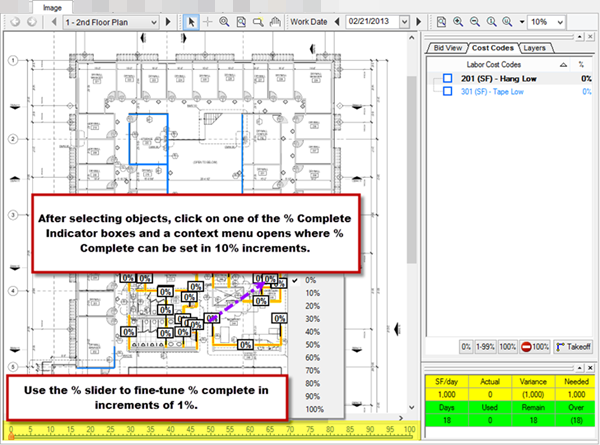
Percent Complete Menu
Click on the Percent Complete Indicator box  to display the percent complete menu. This allows setting percents in increments of 10%.
Select a percentage and the Percent Complete Indicator box updates for all selected objects and the Labor Cost Codes window updates to reflect the % complete for the current page.
Percenting Slider
Use the percentage scale (the Slider), at the bottom of the Image Tab, to set percent complete in increments of 1%. Either slide the point or simply click on the percentage to set it. The percent complete indicator boxes for all selected objects update accordingly.
Repeat this process for all Pages and Cost Codes where work was performed.
Next up, we will look at how you tell Digital Production Control how much labor was used to complete the work you just "percented".
 Percenting Step 3 - Select Which Objects to Percent Percenting Step 3 - Select Which Objects to Percent | Timekeeping Overview (Tracking Labor Used)  |
Related Articles