
Report Formatting refers to the appearance of the actual report. This allows you to edit fonts, color schemes, page set up, headers, and footers. Each report is handled independently, so every report can be different.
Report Formatting
To adjust a Reports formatting,
- Select the report in the left-side panel
- Click on "Grid View"
- Click on the Report Settings button in the Reports Tab ribbon bar
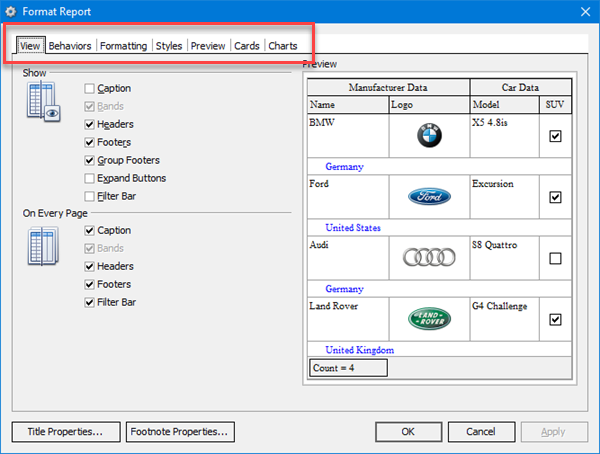
This opens the Format Report window.

There are several tabs in that window, some of which are not used inside PlanSwift. The main tabs that most users will edit are the View, Behaviors, and Styles.
View Tab
The first tab is the View tab. This tab allows you to edit which report components are visible.
Behaviors Tab
The next tab is the Behaviors tab. Here, you can edit how your report will behave.
For example, the Process Selection option will make the report show only what you have selected within that report.

The options under "Expanding" expand all sub items that are collapsed, so they are able to be seen when printed.
Formatting
Under the Formatting tab, it is recommended to leave it set at Ultra Flat.

Styles
The Styles tab is where you can edit fonts and color schemes.

Add a title to your Report and then click on the Title Properties button at the bottom of the window. You can use properties in the Title Properties and Footnote Properties. For example, to add the Job Name to the report title, simply enter [JobName].
Another option for formatting your report is Page Setup. See for more information. In the Page Setup screen, you adjust how the Report will print by setting options such as: printing the Report portrait or landscape, adjusting margins, headers and footers, and Page size and Scaling.
We recommend you do not make any changes on the Preview sub tab.
Also, the Cards and Charts sub tabs are not used in PlanSwift.
 Report Grouping Report Grouping | Export Report to Excel  |
Related Articles