
Modernized search helps you find the right projects or companies for your business with less effort. Improved keyword search and filtering options help to narrow down your results and get the most relevant matches quickly.
Projects/Companies Tabs
To use the Search feature, click the magnifying glass icon on the left side of the screen.
At the top left of the page, you’ll see tabs for Projects and Companies. Click the one you want to search.
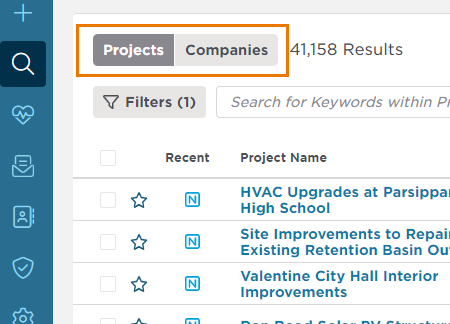
The selected tab will have a darker gray background than the unselected tab. Projects is the default selection.
Filters Menu
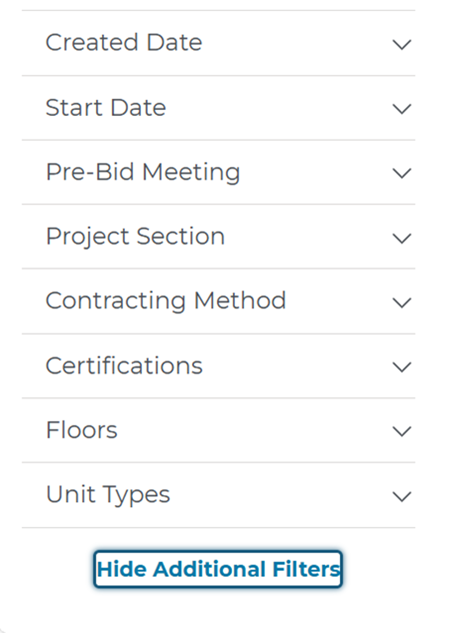
Just below the Projects / Companies tab, click on the Filters button to open the filters menu.
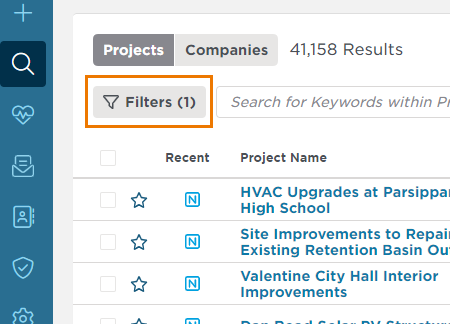
This is where you can fine-tune your search to find the most relevant projects and companies.
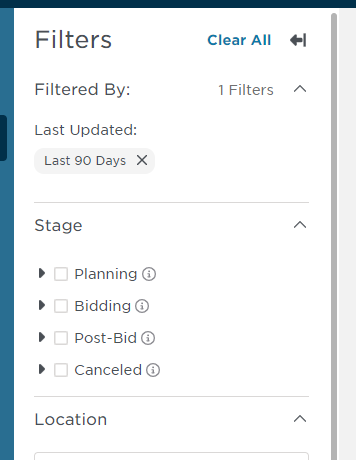
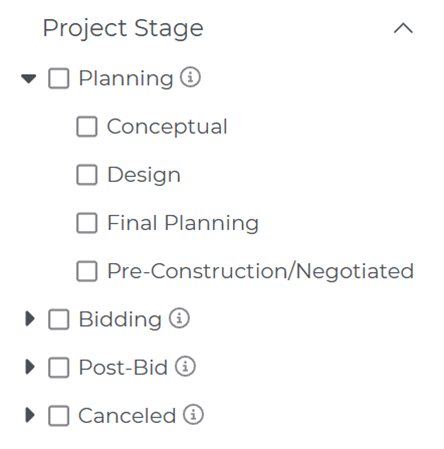
Start by using the Stage filter. Each stage has smaller parts called sub-categories. You can see them by clicking the arrow on the left side of each category name.
For example, if you click the arrow next to Planning, four sub-categories will appear below it: Conceptual, Design, Final Planning, and Pre-Construction/Negotiated (see the screenshot below).
You can check the box next to “Planning” to include all the sub-categories in your search, or you can choose just one or two, like “Conceptual” or “Design,” to narrow down your results.
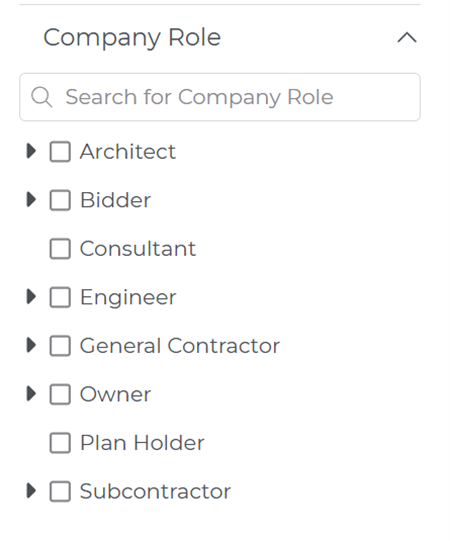
Similar options can be used for Company filters:
On the Projects tab, you can focus your search by picking specific event dates, such as the Pre-Bid Meeting date or the date the project was first added to the system (Created Date).
From there, you can filter your results further by choosing from a menu of fixed date ranges (e.g., Last 7 Days, Last 30 Days, etc.).


To be even more specific, you can choose custom date ranges. Use the calendar or enter dates to narrow your search to the exact timeframe you need.

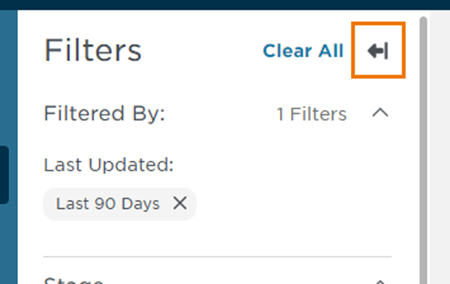
The number of filters applied to your search is listed in the Filters button. At least one filter must be used to see a number.
To close the Filters menu, click the “close” icon at the top right of the Filters panel or click the Filters button.
If you want to remove all your filters and start over, click the Clear All button next to the “close” icon.
<
To view a full glossary of projects and company filters and understand how they work, see the Modernized Search Filter Glossary.
Search Bar
Next to the Filters button you will see the search bar. This is where you can apply keywords to your search and choose what parts of the project you want to search within.

You can search by Name, Details, or Documents. If no option is chosen, searches will look in Details by default.

In Modernized Search, all keyword searches will use Smart Search by default, which includes different forms of the keyword to find more helpful results.
Smart Search Example
Searching the word floor will return results that contain floor or variations, such as flooring or floors.
To do an Exact Search, which looks only for the exact word or phrase, users can put quotation marks around their search terms.
Exact Search Example
Searching the word “floor” will show results with the exact word floor, but NOT words like flooring or floors.
You can also use what’s known as a “wildcard”. This helps if the user is unsure about the spelling or wants to find different versions of a word.
To use a wildcard, the user types the part of the word they know, then adds an asterisk (*) where the missing letters would go.
For full details on how to use Keyword Search, see Keyword Search.
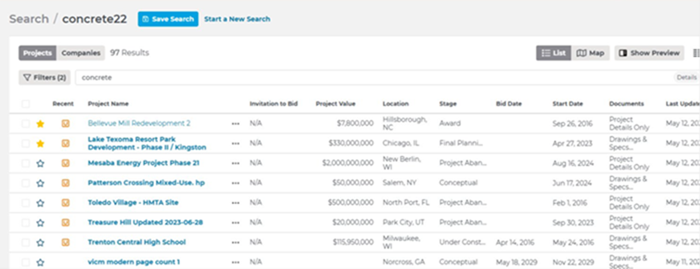
Search Results Section
Under the search bar you will see the results section. This is where you will find the projects or companies that match your search selections.

Search Results Viewing Options
In the top right corner of the search results section, when searching for projects, Project Intelligence Pro users can select List, Map, or Show Preview to change how they want to view their search results.
When searching for companies, your results will always be displayed in List view.
At the bottom right of the page, you can see how many projects or companies are showing on the page and the total number of results from your search.
Just to the left of that, there’s a box called Rows Per Page where you can choose how many items you want to see on each page.

For more information on project search results view options, see Working with Your Search Results.
Adding Projects to Your Watch List
If there are projects or companies within your search results that you would like to add to your Watch List, you can do so in two different ways:
Click the star icon next to the project you want to add:

Click the three-dot menu directly to the right of the project title:

Save Search and Start a New Search Buttons
On the Projects tab, at the top of the Search page, in the center, you will see two buttons: Save Search and Start a New Search.
The Start a New Search button lets you pick the filters you want to use in your search (see the Filters Menu section above), and the Save Search button saves those choices.
After clicking Save Search, a dialog box titled Edit Save Search will appear, prompting you to include a Saved Search Name. You will also be shown three toggle switches asking whether you’d like to do the following:
- Set the search as your default
- Turn on email notifications for the search
- Add a search tag
A window at the bottom will show any filters or date ranges previously applied when clicking Start New Search.
Once you’ve adjusted the settings and notifications to your liking, you can save your results by hitting the Save as New button below the Applied Filters window.
There is also a button to ‘cancel’ if you’d like to exit without saving the search.

If you select a custom date range for one of the Date filters and then save the search, the Saved Search will use those specific dates every time it is loaded. You must edit the search criteria and resave the results to change the date range.
You can see your saved searches in the Saved Search section on the left side of the screen. The last five searches you used will show up there automatically. Below those, you can click the View All button to see the rest of your saved searches.

By clicking View All, a dialog box showing all your saved searches will pop up in the center of the screen. Next to each search, there’s a toggle switch and a three-dot menu. You can use them to do the following: 1.Turn on email alerts, 2. Set a search as your default 3. Delete a search if you don’t need it anymore. From this menu, you can also see which saved searches have a tag associated with them (see the purple stripe to the left of the ‘tags3’ search below).

When you have a particular Saved Search open, you will see the name of that search (as well as a color stripe matching its associated Search Tag) at the top of the page in the center next to the Save Search and Start a New Search buttons (see below).

For more information on saving, loading, and clearing searches, see Working with Your Saved Searches.
Related Articles