
Once you've created your project, the next step is to add some plans to it.
Step 2 - Adding Documents
Support Document File Types
PDF, TIFF, JPG
At the bottom of the Project Details dialog box (Add a Project), you’ll find the controls to add Documents to your Project.
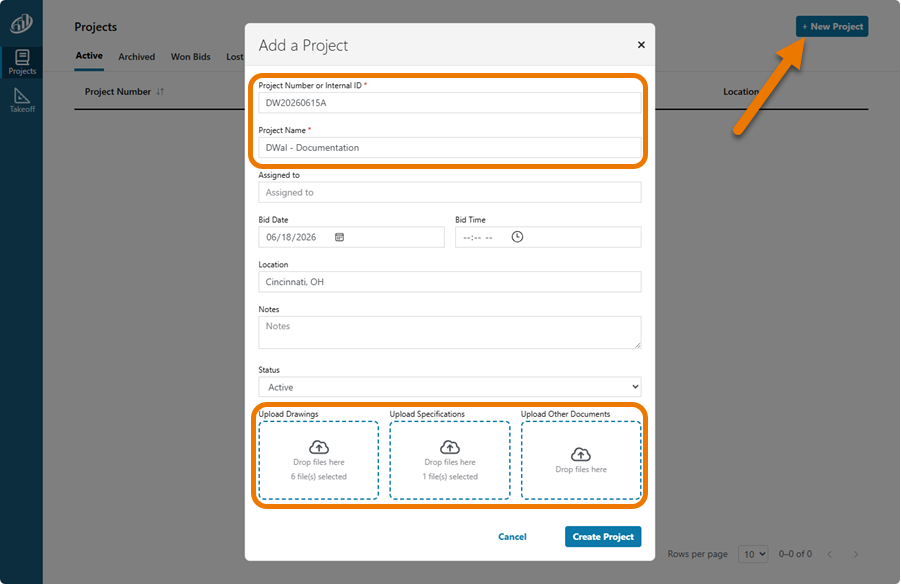
There are two ways to add documents to your new Project:
- You can Drag & Drop them onto the appropriate document type box or,
- You can click on one of the document type boxes to browse your computer for the files to add
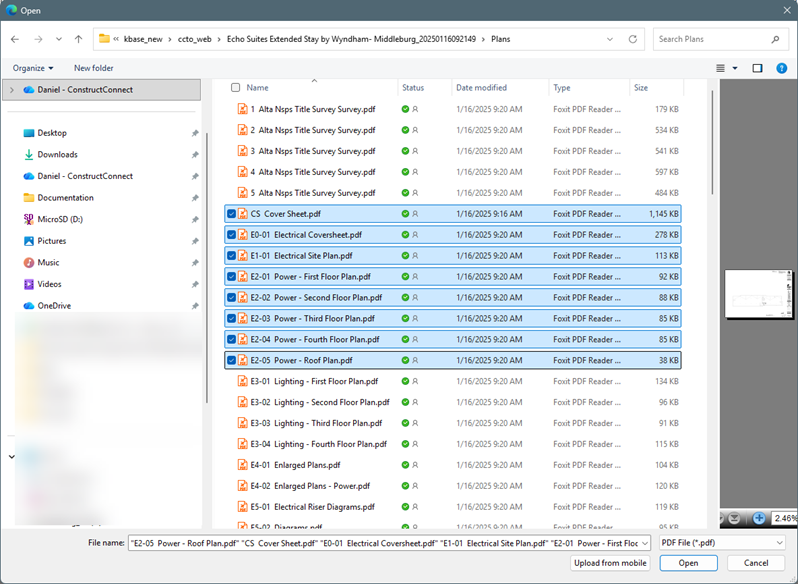
When you’ve located and selected the files you want to add, click “Open”.
Notice that the number of files being added shows in the document type box.
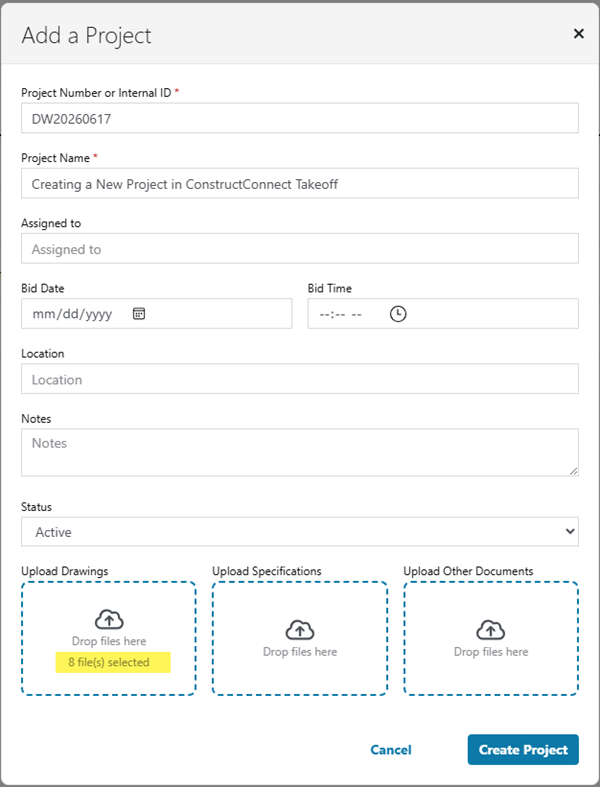
- Click

Your Documents are uploaded and your Project created:
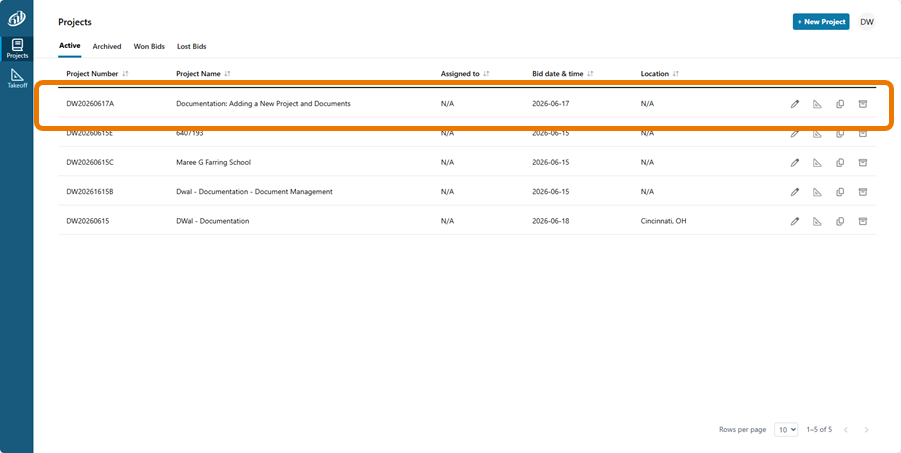
Use the buttons on the right to Edit  , Takeoff
  , Duplicate
  , or Delete
  this Project.
When you add plans to a Takeoff Project, their Sheet Names and Sheet Numbers are updated by Auto Name and the scale is set by Auto Scale.
Takeoff BOOST™’s tools use Artificial Intelligence to provide results. It is your responsibility to verify results to ensure accuracy.
Use of ConstructConnect Takeoff requires uploading your project plans to ConstructConnect's servers. Ensure you have the legal right to do so. Please see the End User License Agreement and Master Service Agreement for more information.
 Creating a Takeoff Project Creating a Takeoff Project | The Takeoff Tab Documents List  |