
You’ll find the Linear Takeoff Tool and the Segment Tool (next article) buttons on the Home Tab’s ribbon bar, in the Takeoff section.
- The Linear Takeoff Tool allows you to calculate lineal footage, yards, meters, etc. and draw connect segments.
- The Segment Takeoff Tool does pretty much the same thing, but allows you to draw disconnected segments.

A Quick Look at the Linear Takeoff Tool (Connected Segments) and Drawing Linear Takeoff
The Linear tool allows you to create a Linear digitized takeoff item on your plan. The Linear tool is easy to use, just set the Properties and then click two or more points on your plan.
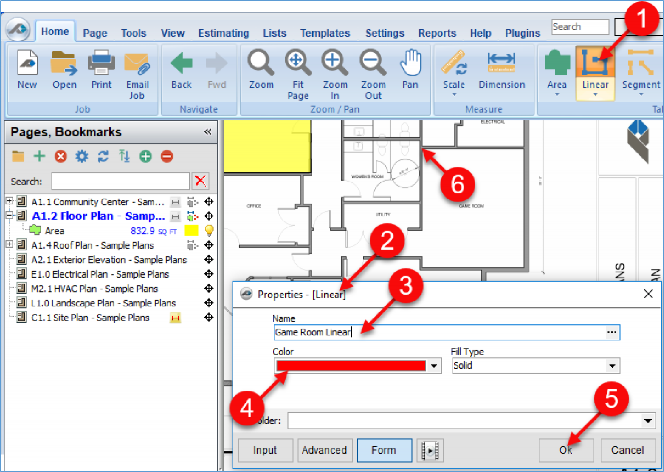
- Click the top of the Linear button
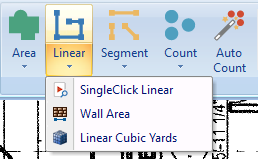
Selecting the lower half opens a drop-down menu of tools based on the basic linear object, such as Wall Area and SingleClick Linear.
The Basic Linear Properties window opens.

In this window,
- Enter a Name for the Linear Item and choose a Color and Fill, if desired
PlanSwift automatically picks a random color; if you would like a different color, simply click the drop-down menu under Color.
- Click OK
If you have not scaled your Page, you are prompted to do so.
Notice that the Digitizer Record button is red; this indicates that the on-screen digitizer is now working.
- Simply click on the endpoints of your Linear item. If you accidentally click in the wrong spot, you can undo it by pressing Backspace or Ctrl-z on your keyboard.
You can end a Linear and remain in the Digitizer Record mode by double-clicking the final point of a Linear. After the double-click you can quickly enter a new Linear without clicking the Linear button.
- End the on-screen digitizer by pressing Esc or by clicking the Digitizer Record button

- Click on the top half of the Linear button on the Home tab menu or press 2 on the keyboard (This opens the Properties [Linear] window.)
- Give the linear takeoff a name
- Select a color for the takeoff
- Click on Ok to begin the takeoff
- Move the cursor crosshairs to the first Point of the takeoff
- Press the M key on the keyboard to magnify the Point for greater accuracy and click on the location where you want to begin the takeoff
- Click on the second Point, using the magnifier as needed
- Click on the third Point to perform the linear takeoff (Note that pressing Ctrl + Z will undo any Point's placement)
- Click on the fourth Point
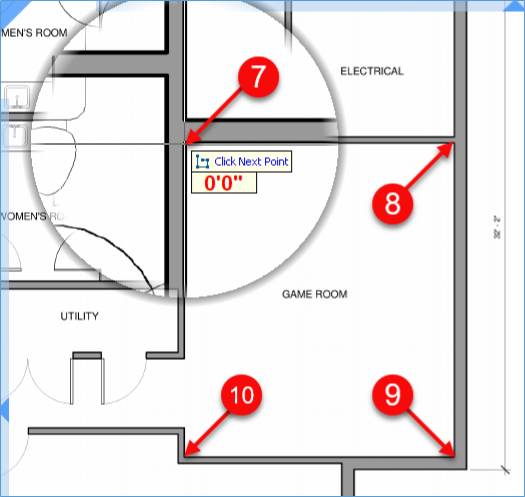
- Click back at the beginning Point, then
- Right-click and click on Stop on the drop- down menu or press C or Esc on the keyboard to close the linear.
The red line depicts the linear takeoff and is 77.1 feet in length.

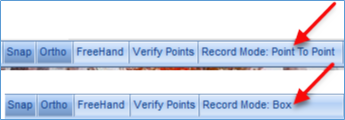
There are two modes for performing linear takeoffs. The default record mode is Record: Point-to-Point. The alternate mode is Record: Box-Mode, which allows you to simply click and drag a box (or click two Points to form a box) when the digitizer is turned on. This mode can only be changed when the Digitizer Record is on and is toggled between the two modes by clicking the Record Mode button located at the bottom of the main window.
Advanced Properties
In the Properties window, clicking Advanced shows you many additional properties/functions for the Linear Takeoff Item.

 Area Takeoff Tool Area Takeoff Tool | Segment Takeoff Tool  |
Related Articles