
PlanSwift provides several ways to move one or more takeoff items. This is particularly useful after copying and pasting a takeoff item and it isn't in the correct position.
Moving Takeoff Items to a Specific Location
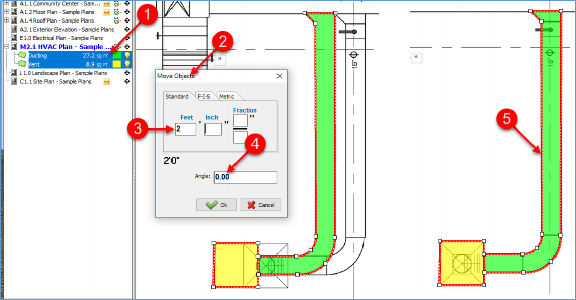
To move takeoff items to a specified location:
- To select a takeoff item, click on the item you want to move
- To select multiple items,
- Hold Shift and click on each of the items (either in the Pages, s window or on the drawing itself), or
- Click and drag the cursor over the items to select them
- Click on an Arrow key on the keyboard that corresponds to the direction you want the items to be moved (in this case the right-arrow key)
This opens the Move Objects window.
- Enter the distance in feet, inches, and fractions that you want the Point moved to the right, for our example, enter 2' 0”
- To change the angle, enter the angle in degrees in the Angle field, for our example, leave this value at zero
The takeoff of the two items is now moved to the right 2'.
Moving Items with a Mouse
To move items with a mouse:
- Select the takeoff item or items as described above.
- Hold down the Alt key, left click on the item (or items), and drag the mouse to move the item or group of items to a new location.
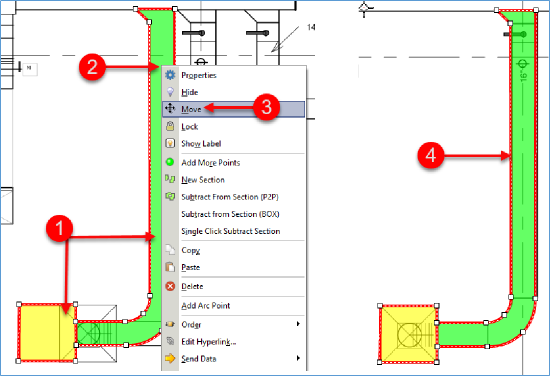
Moving Items Using the Right-Click Menu’s Move Selection
To move items with the right-click menu move selection:
- Select the takeoff item or items as described above
- While holding the cursor directly over one of the selected takeoff items, right-click the mouse to open the right-click drop-down menu
- Select Move from the drop-down menu
- Left-click and hold on any of the selected items and drag the mouse to move the item or items to a new location
 Moving Takeoff Points Moving Takeoff Points | Creating Arcs with Areas, Linears, and Segments  |
Related Articles