
Creating an arc line requires familiarity with performing an area takeoff. Areas, linears, and segments may all utilize arcs, and the method for creating arcs is the same, whether it is an area, liner, or segment arc.
Drawing Area Arcs
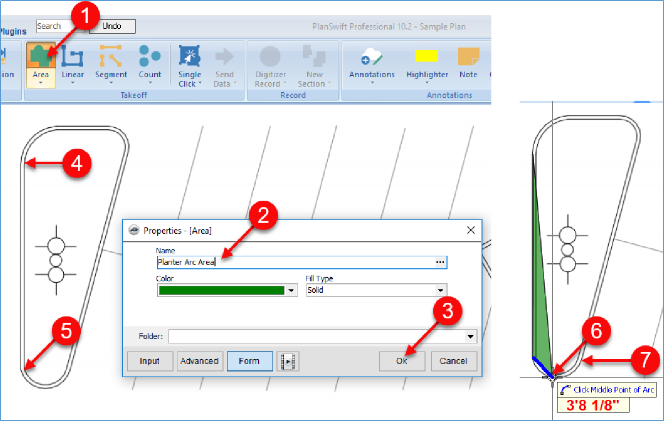
To perform an area arc:
- Click on the top half of the Area button on the Home tab
- Enter a name for the takeoff
- Select a color and click on Ok to begin the takeoff
- Click on the first Point
- Click on the second Point, which begins the first arc, then press the A key on the keyboard. Note that pressing Ctrl + Z will undo any Point's placement
- Click on the middle of the arc for the third Point
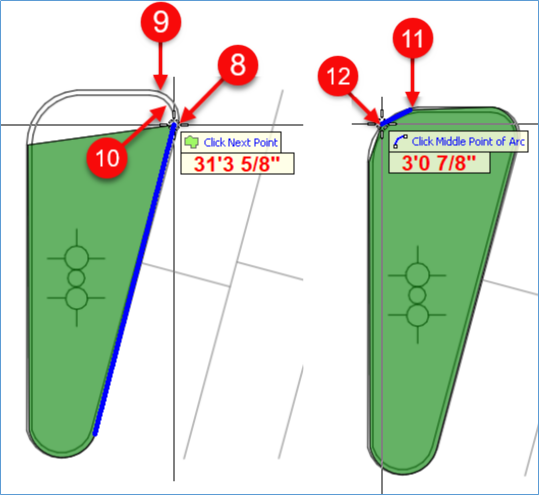
- Click on the fourth Point, which is the end of the first arc (this creates a smooth arc line)
- Click on the fifth Point, which completes the straight line to the second arc and press the letter A again
- Click on the middle of the arc
- Click at the end of the arc (this completes the second arc)
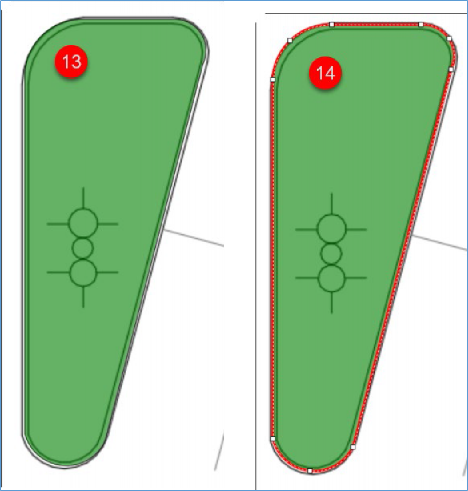
- Complete the straight line and press the letter A again
- Click on the middle of the final arc
- Complete the takeoff by pressing the Esc key (or by clicking on Digitizer Record button or by right-clicking and selecting Stop from the drop-down menu or by pressing the letter C on the keyboard)
- Click on the takeoff again, and each of the arc Points is visible
Linear and Segment Arcs
Drawing linear and segment arcs work identically to an area arc, except that you select top half of the Linear button or the top half of the Segment button on the Home tab menu.
 Adjusting Takeoff - Moving Takeoff Objects Adjusting Takeoff - Moving Takeoff Objects | Creating Closed Circles with Areas and Linears  |
Related Articles