
Before you can start doing takeoff, you’ll need to add at least one image file (Plan) to your Project.
Adding a Single Blank Page
A blank Page is just that, white space, there’s no Plan or Image associated with it. This option is rarely used for anyone doing digital takeoff, but we’ll cover it just in case.
To add a blank page to a project,
- Open a Project’s Cover Sheet (by default, the Plan Organizer tab is visible).
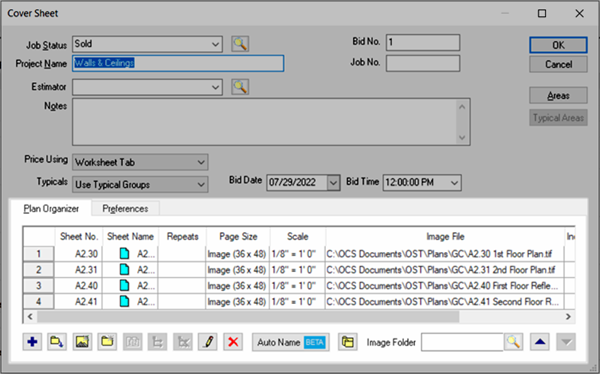
- Click the Add button
 (left-most button) at the bottom of the Plan Organizer tab - this adds a blank page to the project. If you are using paper plans and a digitizer, add the total number of pages needed before starting takeoff - name them based on the paper plans' title blocks.
 - Next, link an image to the new page, see below.
- Set page size and, if known, the Scale for each page. (New, blank pages are added with the settings specified under Tools > Options > New Bid.)
Linking an Image to a Blank Page
To link a Page to an image file:
- Open the Bid Cover Sheet (by default, the Plan Organizer tab is visible).
- Click the Lookup button
 in the Image File column - this opens a browse dialog box named Add Image.
 - In the Add Image dialog, browse for the image to which you want to create a link in the Cover Sheet.
- Once located, select the image file and click the Open button - the dialog closes and you are returned to the Cover Sheet Page Organizer tab.
The Sheet No., Name, and Scale may be changed at any time. You must set and verify scale (on the Image Tab) before doing any takeoff.
The Page Size (or dimensions) may only be changed immediately after the blank page is inserted - once an image is linked to a page the page size cannot be changed.
Adding a New Page and Linking to an Image File (one-step)
To add a single page already linked to an image file using default Page Size and Scale settings:
- Open the Cover Sheet (if it's not already open, that is).
- Click the Insert New Image Page button
 (third button from the left) - this opens a browse dialog box named Add Image.
 - In the Add Image dialog, browse for the image to which you want to create a link in OST.
- Once located, select the image file and then click Open - the dialog closes and you are returned to the Cover Sheet Plan Organizer tab.
The Page Size and Scale are set based on the image file's properties, if available, or to the defaults specified in New Bids options. Page Size cannot be changed.
You must verify Page Scale (on the Takeoff Tab) before doing any takeoff, see What is Scale and Why is it so Important? for more information.
 Filling out the Cover Sheet - Step 2: Using the Plan Organizer to Add Plans to Your Project Filling out the Cover Sheet - Step 2: Using the Plan Organizer to Add Plans to Your Project | Adding Multiple Pages to Your Project  |
Related Articles