
We developed an Auto Name utility that provides fast and accurate results. No need to use another app to rename your pages or spend hours renaming them manually; let On-Screen Takeoff and Auto Name do it for you in seconds. Our Auto Name utility helps you get your project setup in no time. After you load your plans (see the previous articles for the different ways to add plans), use Auto Name to scan your plans to extract Sheet Name and Sheet Number.
If you used previous versions of On-Screen Takeoff's Autonaming utility we heard your feedback and started from scratch with Auto Name. We encourage you to try our all-new Auto Name (available in version 3.98.10.49 and higher); we are certain you will be delighted by the performance and results.
Auto Name is only accessible to users under a current maintenance subscription. To renew your maintenance, contact your Customer Success Manager.
Auto Name is a two step process: first, you tell Auto Name where to look for the Sheet Name and Number on your plans. Then you run Auto Name which does everything else for you.
- Select the Pages on which You Want to run Auto Name
- Define the Sheet No. and Sheet Name Locations
- Run Auto Name and Check Progress
You must be under a current Maintenance Subscription to use Auto Name. If you have allowed your Subscription to lapse, please contact our Client Services at 866-426-2447 to renew today!
You also need an active, high-speed Internet connection to use this utility (plans are uploaded to our cloud, analyzed, and then a data file is downloaded to On-Screen Takeoff that contains updated Sheet Numbers and Sheet Names). Please see Related articles for information on ensuring your Firewall is set up to allow this communication with the "Cloud".
Select the Pages on which You Want to Run Auto Name
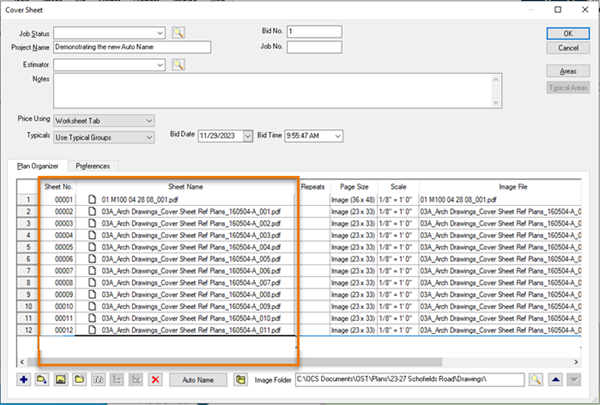
Open the Cover Sheet for the Bid (if it's not already or still open).
Note the current Sheet Numbers and Names - based on the Image File name...
Click the  button at the bottom of the dialog box; the Auto Name panel displays and a "Status" column is added to the Plan Organizer grid. (If no Page(s) is selected (clicked on/highlighted) in the grid, the panel is disabled.)
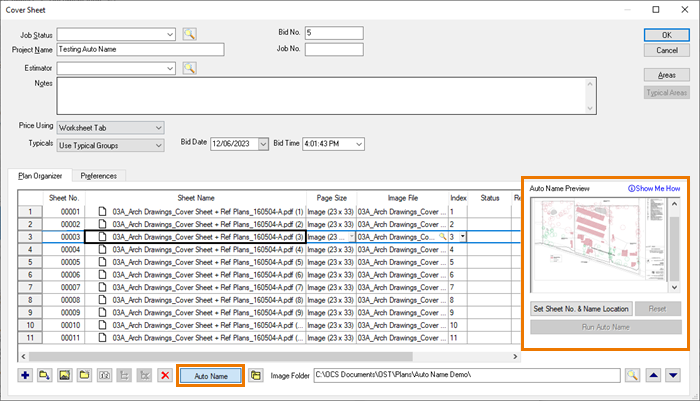
Next, we're going to tell Auto Name where to look on each plan for its Sheet No. (optional) and Sheet Name. First, though, we have to make an educated guess and try to figure out which Pages' plans would have the have their Sheet No. and Sheet Name in the same relative location on each plan.
Select those Pages or use Page Folders to put them in a folder (see Related Articles for details).
Page Folders
When you use Page Folders, you can select the folder instead of the Pages inside the folder. Auto Name assumes that all Pages in a folder have their Sheet No. and Sheet Name in the same location so you set the Sheet No. and Sheet Name at the folder-level, rather than per-page.
- If you organize your Pages into Folders, you define the reference location for all the Pages in that folder. If there are Pages in that folder that have Sheet Number or Name locations that don't match the others, move them out of the folder - Auto Name will not process them.
- You must select Pages of the same Size - Auto Name uses the defined location for all the selected Pages based on the coordinates of the first Page, if any of the Pages are smaller or larger, Auto Name will not process them.
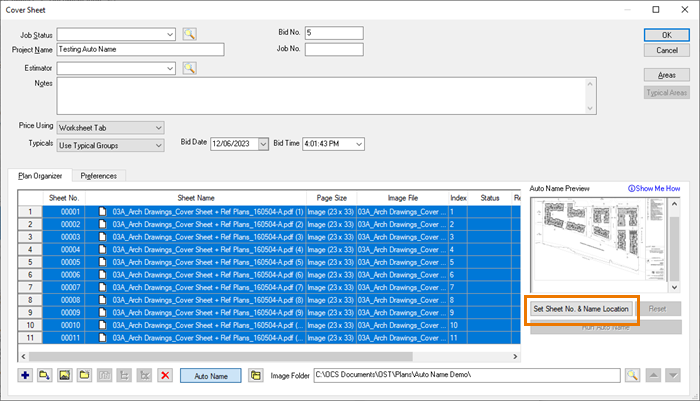
Define Sheet No. and Sheet Name Locations
Once you have one or more Pages selected, click the  button.
Setting the Location is critical to getting good results with Auto Name, because it instructs the service where to look on your Plan for Sheet No. and Sheet Name so it can ignore the rest of the content on the drawing.
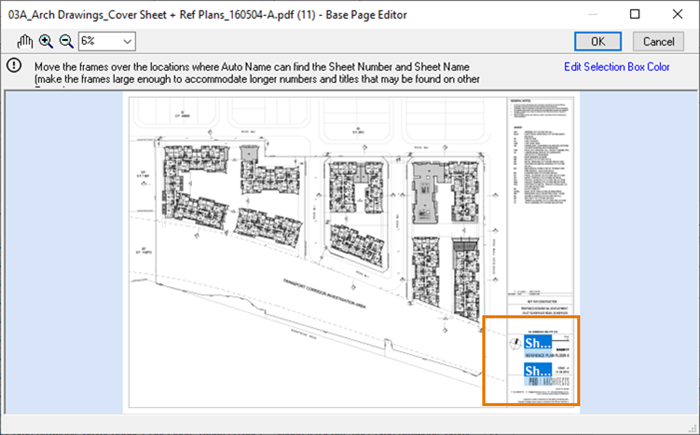
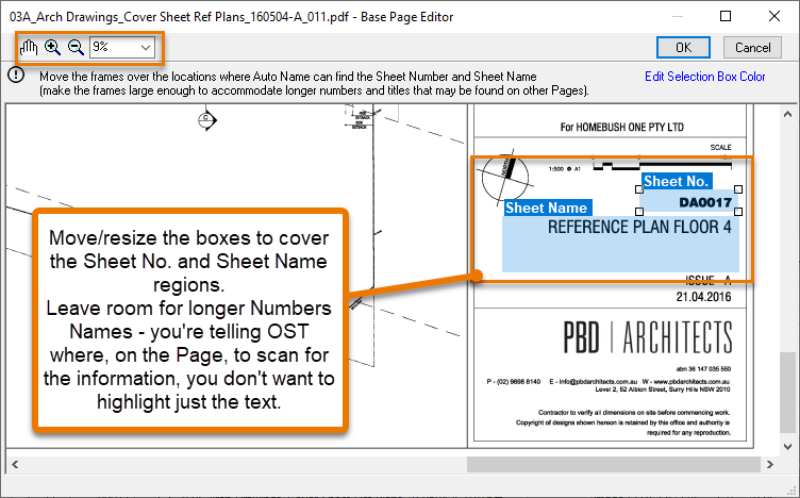
A preview of the plan opens with two boxes in the bottom right corner (they are similar in function to the editing Rectangle Annotations) labeled "Sheet No." and "Sheet Name".
You'll resize and move these boxes to define where Auto Name should look for the Sheet No. and Sheet Name on the plan.
First, you'll probably need to pan and zoom to locate the Sheet No. and Sheet Name in the title block. You can use the buttons at the top of the screen or the normal keyboard shortcuts to manipulate the plan view.
Next, drag the boxes to their appropriate location and resize them. Here's an example from our plan set...
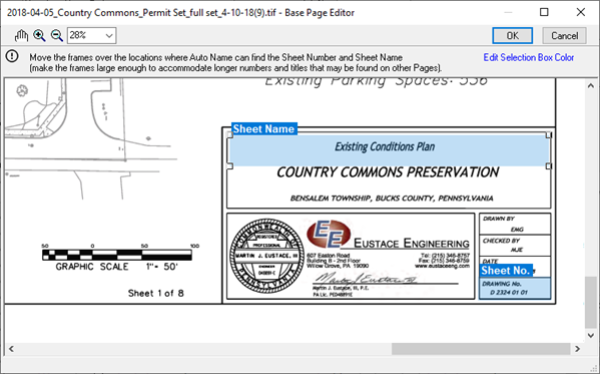
Here's another example of placement of the location boxes from a different plan set...
Make the boxes (especially the Sheet Name box) big enough to accommodate Numbers and Names that are longer than what is shown on this plan. Don't just cover the current Sheet Name, cover the entire "field" that can be used for Sheet Name. Same for Sheet No.
These location boxes allow Auto Name to "ignore" the rest of the plan when trying to determine the Sheet No. and Sheet Name and these regions are used for all the Pages you selected in the Plan Organizer.
When you have set the Sheet No. and Sheet Name locations, click the OK button at the top of the dialog box.
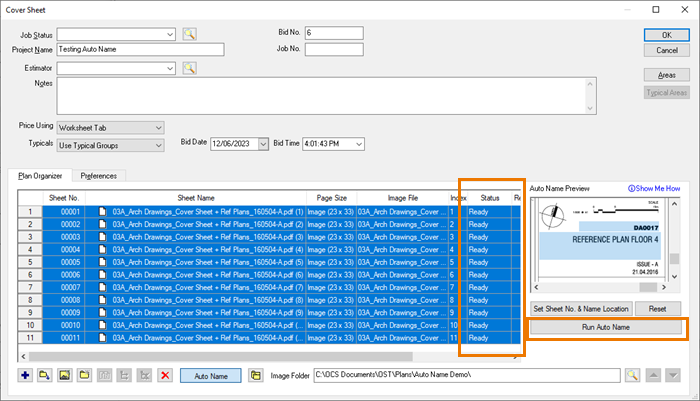
This returns you to the Cover Sheet. Notice the Status column displays "Ready" for the Pages for which you've set Sheet No. and Sheet Name Location.
"Ready" only indicates that you have opened the Set Location dialog box for these Pages and then clicked OK, this does not mean the location is correct - that's up to you to ensure you've defined the locations correctly.
If you need to adjust the Sheet No. or Sheet Name for one or two Pages (after setting location for some/all of the Pages in the Plan Organizer), you must select those Pages and click the  button before editing/updating the location boxes. If you don't Reset individual Page, Auto Name will update the location for all Pages in "Ready" status.<
Run Auto Name and Check Progress
Click the  button, a notification displays...
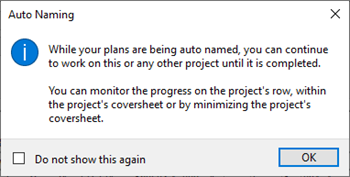
While Auto Name is processing this project's plans, you can work it in it or any other project in On-Screen Takeoff.
Each Page's Status updates from Ready to Processing and then to Completed, as it is processed by Auto Name.
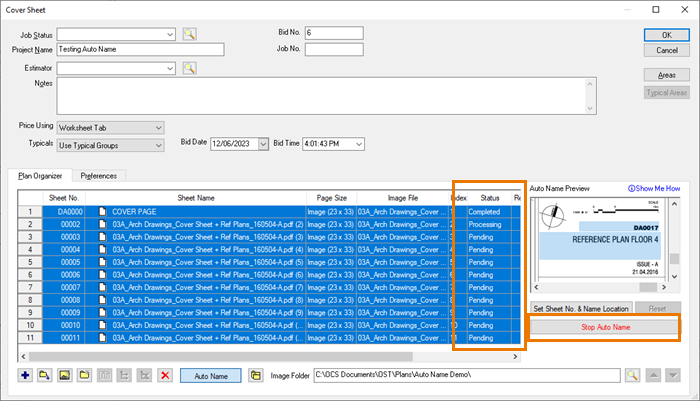
Click the  button to interrupt processing. Pages whose Sheet No. and Names are already updated remain updated.
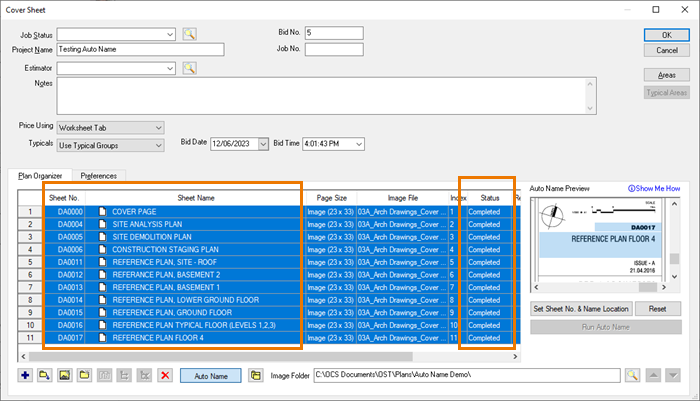
As each plan is processed, the Page's Sheet No. and Sheet Name update immediately and its Status is set to Completed.
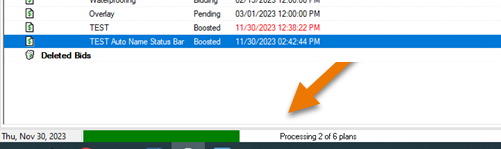
You can close the project's Cover Sheet anytime and monitor progress on the status bar...
Bad Results?
Auto Name relies on the user to tell it where to find the Sheet No. and Sheet Name on one or more Pages. Setting the Location properly is what allows Auto Name to run quickly and with high accuracy. Please review the FAQ Why is Auto Name Returning Bad Results? if you aren't getting back the results you expect from Auto Name.
 Duplicating an Existing Page in Your Project Duplicating an Existing Page in Your Project | Copying and Pasting Bids from One Database to Another  |
Related Articles
Configuring Your Firewall for On-Screen Takeoff