
There are eight Shapes available for drawing Annotation including: Callouts, Arrows, Lines, Rectangles, Ovals, Polygons, Clouds, and Ink (Freehand).
Drawing Shapes

To adjust line color or width before drawing a Shape Annotation, click the small downward facing arrow next to the button.

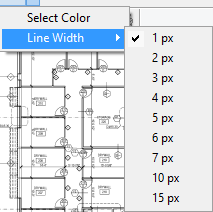
Defaults may be set under Tools > Options > Fonts and Colors (see Related Articles for more information on setting defaults for Annotation).
Once a Shape is drawn on the plan, you can adjust its size and position by using the Selection Tool ![]() and then adjusting the annotation as needed, see Related Articles for more information.
and then adjusting the annotation as needed, see Related Articles for more information.
Shape Annotations retain the last color and line width used. For example, if you change the color and line width in Bid "A", then open Bid "B", when you select the same Annotation Shape, it is set to the last color/line width you selected.
Callouts

- Click the Callout button
- Then click on the plan to set the starting point (where the arrow will point)
- Drag away from this spot to draw the callout box
- Then, type in the message and adjust font as needed
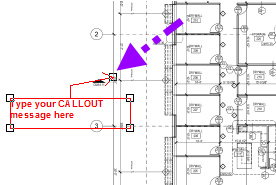
Arrows
![]()
- Click the Arrow button
- Then click on the plan to set the starting point
- Click again to draw the ending point
![]()
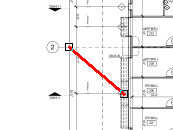
Lines

Click the Line button, then click on the plan to set the starting point, click again to draw the ending point.
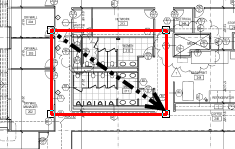
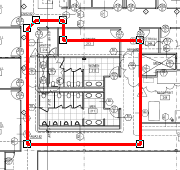
Rectangles

- Click the Rectangle button
- Then click on the plan to set the starting point
- Hold down the mouse button and drag to the ending point
- Release the mouse button to complete the Annotation
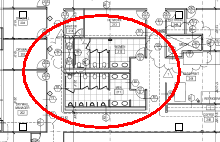
Ovals

- Click the Ovals button
- Then click on the plan to set the starting point
- Hold down the mouse button and drag to the ending point
- Release the mouse button to complete the Annotation
Polygons

- Click the (Polygon) button
- Then click on the plan to set the starting point
- Click on each corner (vertice) to set additional points
- Double-click to complete (close) the Annotation
Just like Area takeoff, you cannot draw an 'uncloseable' polygon (cross lines). If On-Screen Takeoff generates a 'thunk' sound, that indicates that the segment cannot be drawn, or the polygon cannot be closed. Press ESC on your keyboard to back-up to a point where you have not crossed lines or drawn a polygon shape that cannot be 'closed'.

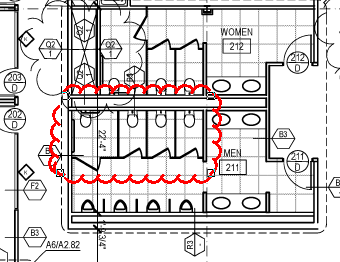
Clouds

- Click the Cloud button
- Then click on the plan to set the starting point
- Click on each corner (vertice) to set additional points
- Double-click to complete the Annotation
Just like Area takeoff, you cannot draw an 'uncloseable' cloud annotation (cross lines). If On-Screen Takeoff generates a 'thunk' sound, that indicates that the segment cannot be drawn, or the polygon cannot be closed. Press ESC on your keyboard to back-up to a point where you have not crossed lines or drawn a polygon shape that cannot be 'closed'.
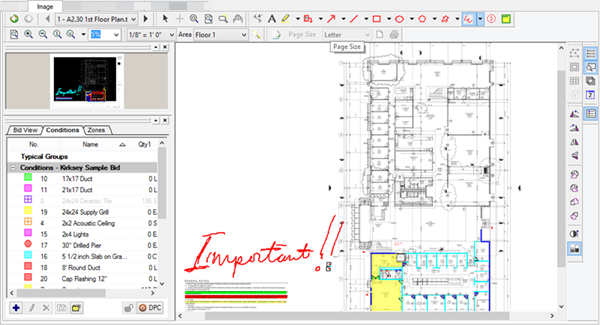
Ink (Freehand)

- Click the Ink button
- Click on the plan to set the starting point
- While holding down the mouse (or pressing a digitizer pen to the screen), draw or write whatever you want on the screen
- Double-click to complete the Annotation
See Related Articles for information on editing Annotation after you draw it.
 Highlighter Tool Highlighter Tool | Named Views and Hot Links  |
Related Articles