
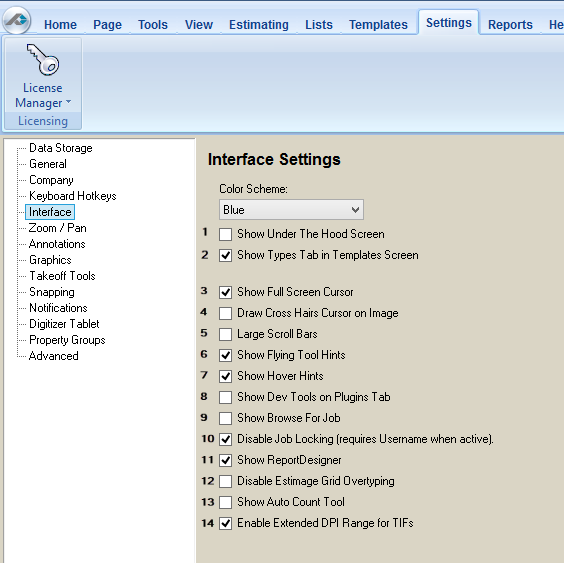
You can customize the look and feel of PlanSwift by adjusting options on the Interface Settings screen.
Color Scheme
You can pick adjust the color-scheme of the application using the drop-down.

Blue color scheme (Default)

Black color scheme

Silver color scheme
Additional Interface Settings
1 - Show Under The Hood
When checked (not checked by default), shows the Under the Hood Screen Tab (but requires a password). This allows access to some of the internal settings of PlanSwift; although you may need to make changes here, we recommend against using Under The Hood.
The Show Under The Hood Screen displays the UTH (Under-The-Hood) tab after a password is entered. Going "Under-The-Hood" allows the programmer to link to PlanSwift software to develop applications that work with PlanSwift. Under-The-Hood provides a programmer the capability to link to PlanSwift software to develop applications that work with PlanSwift. This tab is used for accessing the Application Programming Interface (API) and is for developers only. PlanSwift's technical support team does not support going under-the-hood. You are on your own! Additional API information is available in Related Articles. We recommend that you backup all your data before venturing into the API.
You will need a password from Technical Support to access the UTH function.

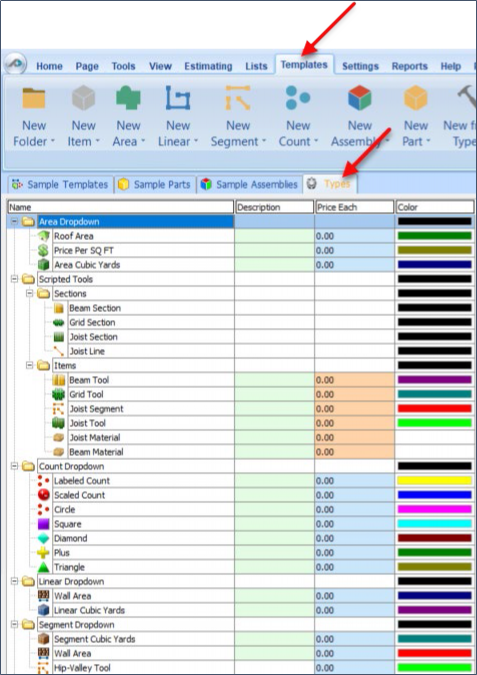
2 - Show Types Tab in Templates Screen
When checked (not checked by default), displays the Types tab in the Templates screen. The Types tab allows you to make universal changes to default items. PlanSwift recommends additional training to use this feature.
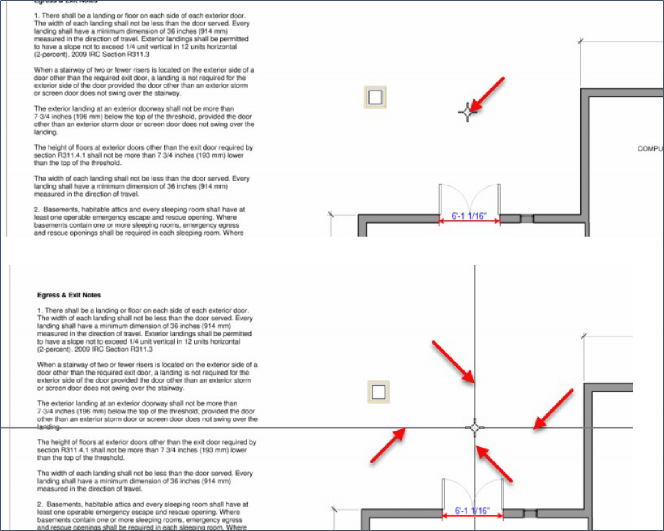
3 - Show Full Screen Cursor
When checked (default), causes the cursor crosshairs to extend across the page's entire area. The upper diagram shows just the cursor; the lower diagram shows the full-screen cursor.
4 - Draw Cross Hairs Cursor on Image
The Draw Cross Hairs Cursor on Image is not Implemented.
5 - Large Scroll Bars
When checked, Scroll Bars along the side and bottom of the screen become twice as wide.

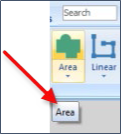
6 - Show Flying Tool Hints
When checked (default), shows the flying tool hints. Hover the cursor over the tool to see the hint.
7 - Show Hover Hints
When checked (default), shows the takeoff hints when you hover the cursor over a takeoff.
8 - Show Dev Tools on Plugins Tab
When checked (not checked by default), shows the developer tools on the Open Job window (#b) that allows you to navigate (using the Select Job Folder window, #c) to other locations where jobs are stored.
9 - Show Browse for Jobs
When checked (not checked by default), displays a Browse button on the Open Job window that allows you to navigate (using the Select Job Folder window) to other locations where jobs are stored.

10 - Disable Job Locking
The Disable Job Locking has not been implemented.
11 - Show ReportDesigner
When checked (not checked by default), displays the Report Designer button on the Reports tab. Before the button is displayed, you are asked to confirm that this is an advanced tool that may require additional training. See Related Articles for more information.
12 - Disable Estimate Grid Overtyping
When checked (not checked by default), does not delete existing text in an estimating field when the field is edited. When it is not checked, any text in a field is deleted and replaced by newly entered text.
13 - Show Auto Count Tool
When checked (not checked by default), shows the Auto Count tool on the Home Tab. See Related Articles for details.
14 - Enable Extended DPI Range for TIFs
When checked (not checked by default), enables higher ranges of DPI to be entered when pulling in plans.
 Keyboard Shortcuts Keyboard Shortcuts | Zoom and Pan Options  |
Related Articles