
We encourage you to re-use things you created already such as employing Takeoff Item Templates and copying-pasting takeoff and other objects duplicating etc. Sometimes however the Page on which that "something" exists and where you want to paste it are not oriented the same way or (and this happens often with Counts) they are angled differently.
You can use rotate (around a single axis described below) and spin (rotating around individual axes described in the next article) to adjust takeoff objects to match your Plans visually. Rotating is not the same as aligning a gridded area see Related Articles for more information on drawing and aligning gridded area takeoff.
Rotating a Single Object
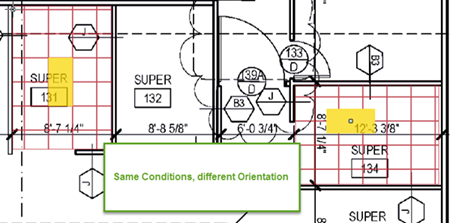
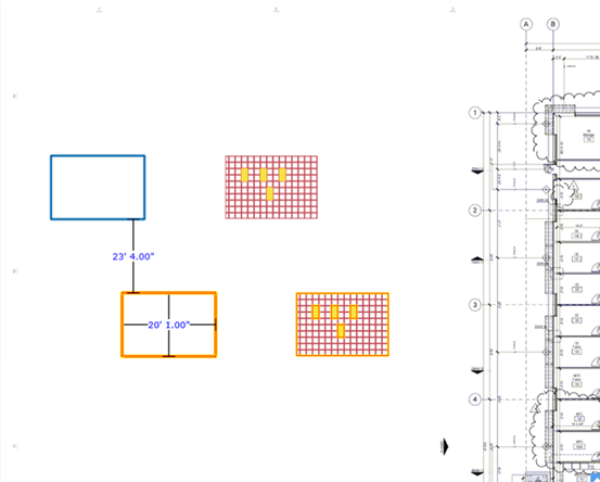
For our first example we've already taken off the office on the left in our screen shot and noticed that it is pretty much the same size as the office on the right. But the office on the right is rotated 90 degrees.
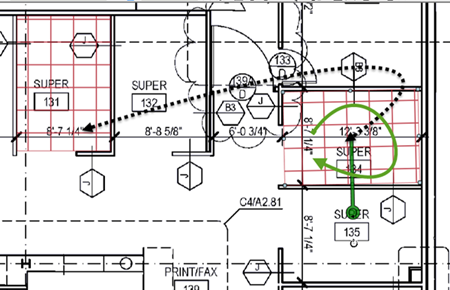
Using your preferred Copy/Paste technique (as discussed in the Related article) create a copy of the takeoff in the approximate position. Before you do anything else of course you need to rotate it to 'fit' where it is going.
There are several methods for rotating takeoff. Above we are using the Rotation tool which can be activated by:
- Right-clicking a takeoff object and selecting "Rotate Takeoff..."
- Clicking the Rotate Takeoff button
 on the main toolbar
 - Pressing <Ctrl> + <R> on your keyboard
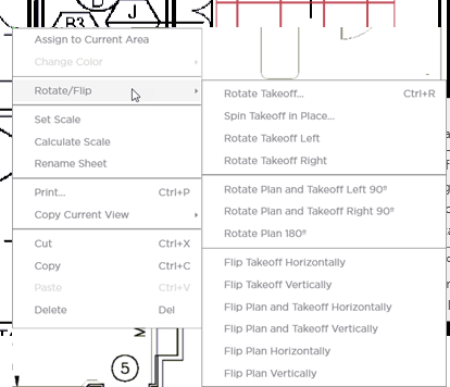
The Rotation control displays on or near your takeoff object so your can rotate it however many degrees you like.
If your object is off exactly 90 degrees like our example, use the Context Menu (right-click) and select "Rotate Takeoff Left/Right".
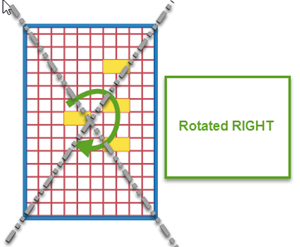
A Note about Rotating Area Takeoffs with Grids and Attachments.
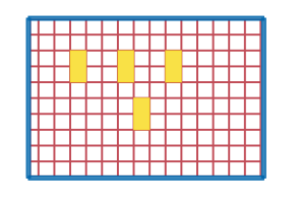
After you rotate an Area takeoff object it behaves a little differently when you use Attachments.
Because the Area (Parent) object was rotated, any Attachment object placed on is automatically be rotated. You may need to rotate the Attachment object back 90 degrees (in our example it is 90 degrees but it could be any number of degrees) so it matches the plans and the orientation you are expecting.
It is important that you accurately match up Attachments to the grid otherwise the tile count may be off. In our example if we hadn't rotated the Attachment to match the grid we'd have affected six tiles instead of only two.
Single objects can be rotated around their individual axis but what happens when you select multiple objects?
Rotating Multiple Objects
For this we are going to use a blank portion of our Page so you can see exactly what is happening with the takeoff objects.
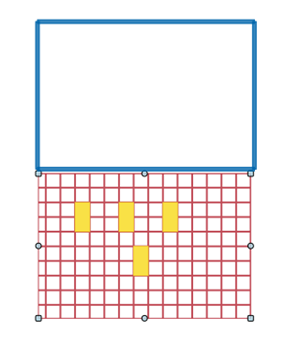
Let us look at a 'room' with four Linear walls an Area with a grid and a few Attachments. When we select all these objects (usually by drawing the Select box around the objects) the program treats them like a single object and rotates everything around the central axix:
That's pretty easy to understand we rotated around the central point for the group of objects. But what about the next example where we have the gridded area next to the linear box.
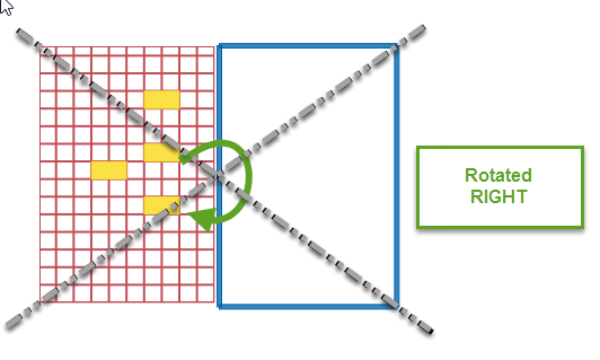
Again the program treats this entire group as a single object which is rotated around its center axis.
Now let's see what happens when the Group is separated by some white space we are going to be drawing a selection box that includes white space around all four of these objects.
After selecting these objects and rotating...
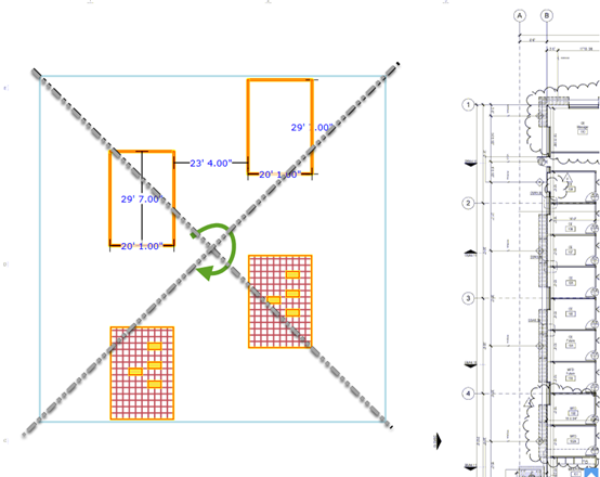
In our example the Selection box is shown in light blue so you can see where it was drawn. That Selection box encompasses the takeoff objects (centered horizontally or vertically whichever is necessary) and some buffer around the objects. The entire Selection box and everything within it is treated as a single object and rotated around its center axis.
If you wanted to rotate multiple pieces of takeoff around each object's own individual central axis use Spinning, covered in the next article.
 Adjusting the Shape of an Area Object Adjusting the Shape of an Area Object | Spinning Takeoff Objects Around Each Object's Individual Centerpoint  |
Related Articles