
Rotating a Page versus Rotating just the Plan
When you add a Plan Set you are given the opportunity to rotate the plan in 90 degree increments in the Plan Set Editor. Once the Plan Set is saved you are only allowed to rotate in 180 degree increments to preserve the orientation of the page.
When you rotate a Page from the Takeoff Tab there are a few rules you need to be aware of.
- When you rotate a Page you are rotating all Revisions of the Plan not just the Revision currently being displayed.
- On the Takeoff Tab when you use the controls described in this article you're rotating the Page - the Container that stores the plans the takeoff the annotation everything.
- You have the option to rotate the Page (the Plan and everything on it named "Plan and takeoff" in the menu) 90 degree increments. To maintain orientation with the Plan takeoff and most annotations are included when you rotate the Page. This ensures they 'stay on the page' (because you are changing orientation (landscape/portrait) when you rotate 90 degrees).
- You can also flip the Page (Plan and Takeoff) horizontally or vertically again the orientation of the Plan and the Takeoff continue to match).
- You have the option to rotate the Plan (alone) in 180 degree increments because the orientation stays the same (same principle for flipping a Plan vertically or horizontally - its orientation (to the Page/takeoff on that Page) stays the same).
- You can use the Takeoff rotation tools (both the ones toward the top of each Takeoff Window and in the context menu explained here) to adjust one or more selected takeoff objects independent of the Plan or Page.
On the Revision and Set Navigation toolbar:
- Click the
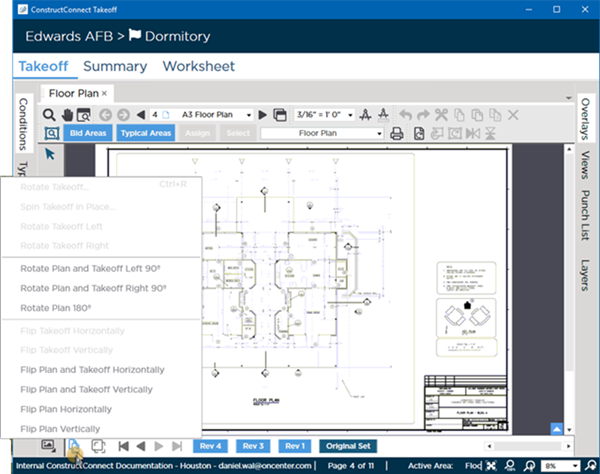
 button (the first button on the left at the bottom of the Takeoff Window) to open a context menu where you can select to rotate or flip this Page.
Rotating and Flipping takeoff by itself is covered in Related Articles.
| Option | What it Does |
|---|---|
| Rotate Plan and Takeoff Left/Right 90° | Rotates the Page (Plan Takeoff and most Annotations) in 90 degree increments (this is allowed because the takeoff is included so it should continue to match the Plan). |
| Rotate Plan 180° | Rotates the Plan only in 180 degree increments. You can also use the  button in the Rotate Takeoff and Plan Toolbar toward the top of the Takeoff Window.) button in the Rotate Takeoff and Plan Toolbar toward the top of the Takeoff Window.) |
| Flip Plan and Takeoff Horizontally | Flips the plan all takeoff and most annotation side-to-side. |
| Flip Plan and Takeoff Vertically | Flips the plan all takeoff and most annotation top-to-bottom. |
| Flip Plan Horizontally | Flips the plan side-to-side but leaves all takeoff and annotation in the same position. |
| Flip Plan Vertically | Flips the plan top-to-bottom but leaves all takeoff and annotation in the same position. |
Notice there are several options on that menu that are disabled. We cover rotating takeoff in Related Articles, we focus on rotating the Plan here.
- When rotating a Page Annotation such as Textbox and Stamps remain in their original orientation (so they can be read without turning your head 90 degrees).
- Rotating/Flipping a Page does not rotate any other Pages in the Plan Set but rotates every Revision of this Page. Each Page must be rotated separately.
- If you realize that the Plan only must be rotated 90 degrees, you can return to the Plan Organizer and do so. This may cause takeoff or Annotations on the Page to fall "outside" the Page boundaries making it impossible to see those objects. You can delete them but only by using Ctrl+A and deleting everything on that Page. This is why the program prevents you from rotating the Plan independent of takeoff/annotations once it's been saved on the Takeoff Tab.
 Navigating Plan Sets (Revisions) on the Takeoff Tab Navigating Plan Sets (Revisions) on the Takeoff Tab | Deleting Pages from a Project  |
Related Articles