
Digitizer Group Digitizer Options
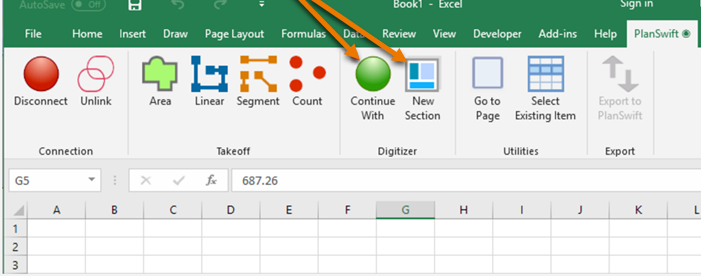
The PlanSwift Ribbon-bar Tab Digitizer Group contains two options, Continue With and New Section, which perform the same function from Excel.
- The Continue With option allows you to right-click on a takeoff cell (Area, Linear, Segment, or Count) in an Excel workbook; this invokes the digitizer so that you can move directly to PlanSwift and digitize a new area, linear, segment, or count section. The value of the newly digitized property is then added to the takeoff value in Excel.
- The New Section option allows you to right-click on a takeoff cell (Area, Linear, Segment, or Count) in an Excel workbook; this invokes the digitizer so that you can move directly to PlanSwift and digitize a new area, linear, segment, or count section. The value of the newly digitized property is then added to the takeoff value in Excel.
The procedure below (which first has you create a takeoff and then add a new section to that takeoff) demonstrates how these options work.
The Continue With option is also available on the Right-click Menu.

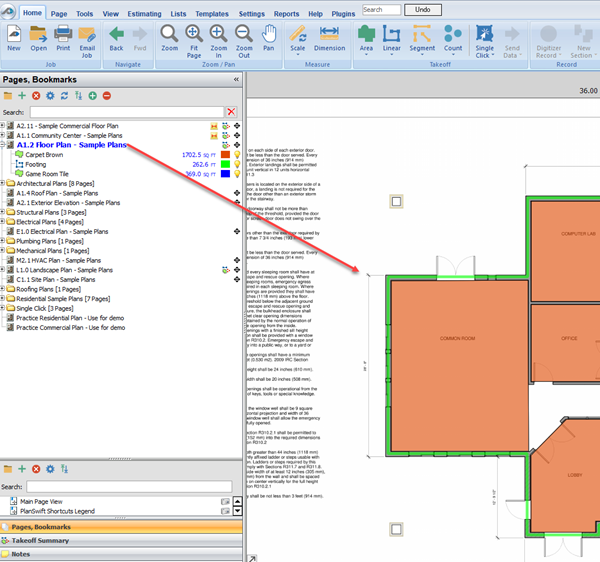
- Open PlanSwift and open the A1.2 Floor Plan - Sample Plans plan
- Open the Excel workbook that is associated with this floor plan that is covered in the previous two links: and
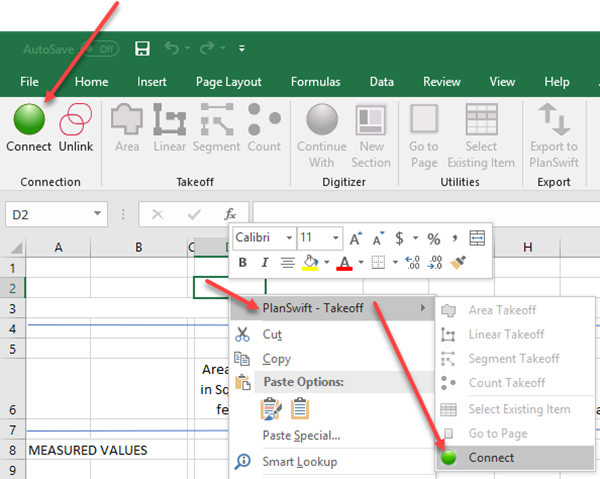
- Connect to the workbook as shown in Figure 4 by clicking on the Connect option or by right-clicking on any cell, hovering the cursor over the PlanSwift - Takeoff Right-click Menu, and selecting Connect.
- Add Rest Room Tile under Game Room Tile entry
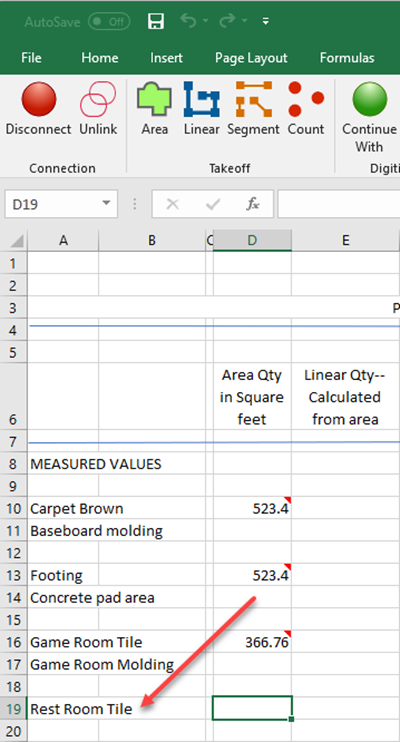
- Click on cell D19 for the Rest Room Tile
- Click on Area on the PlanSwift Ribbon-bar Tab, and click in cell D19 for Rest Room Tile
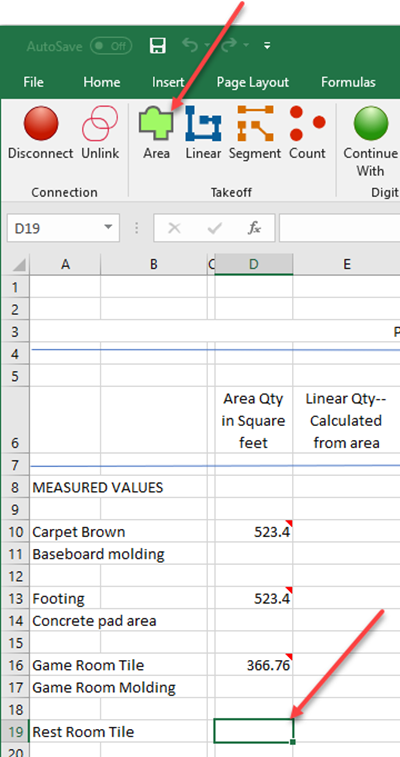
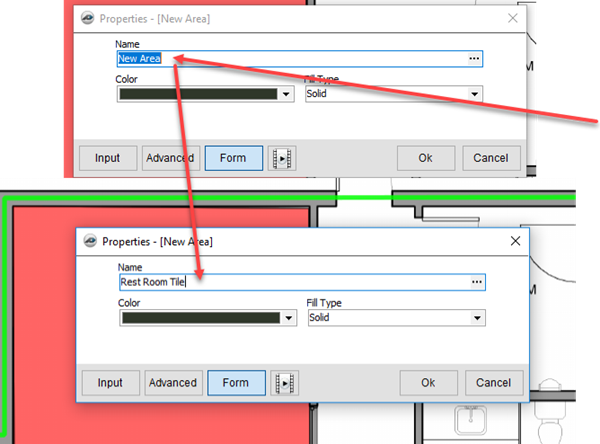
- Enter the area's Name as Rest Room Tile (Figure 6) in the Properties - [New Area] window that appears in PlanSwift
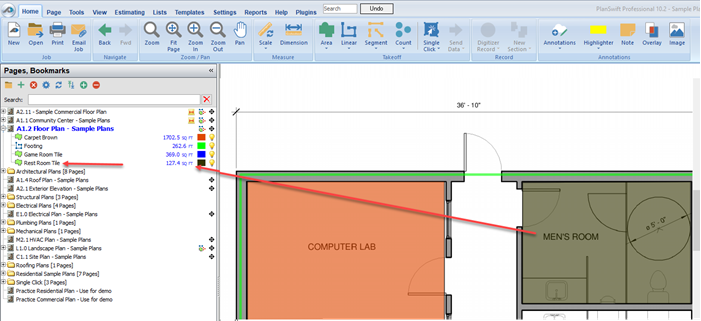
- In PlanSwift, perform an area takeoff for the Men's Room Tile (your Area takeoff tool is all ready to go), the screenshot below shows the completed takeoff - the area is approximately 127 square feet
- Since the Women's Room is to get the same tile as the Men's Room and its tile needs to be added to that of the Men's Room, click on cell D19 to select it and click on either Continue With or New Section
- Now to go PlanSwift and complete the takeoff for the Women's Room - once the takeoff is complete, the two restrooms' square footage will add up to approximately 269 square feet
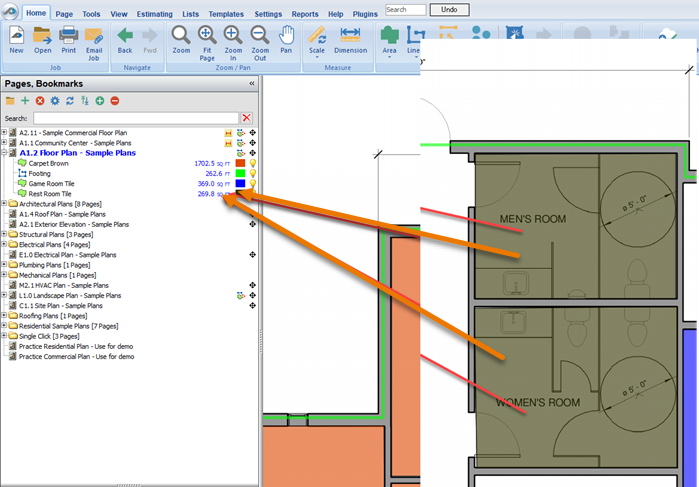
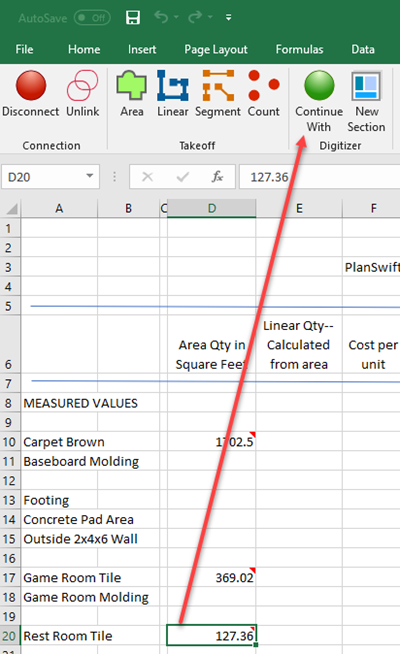
- The square footage in PlanSwift agrees with the square footage in Excel
Adding New Sections to Takeoffs
The Digitizer group Continue With and New Section icons, which work identically in Excel, are used to digitize (or add) a new section to a takeoff. Follow the procedure below to add a new section to an existing takeoff. Note that PlanSwift must be open and a job and a floorplan selected before you can add a new section to a takeoff.
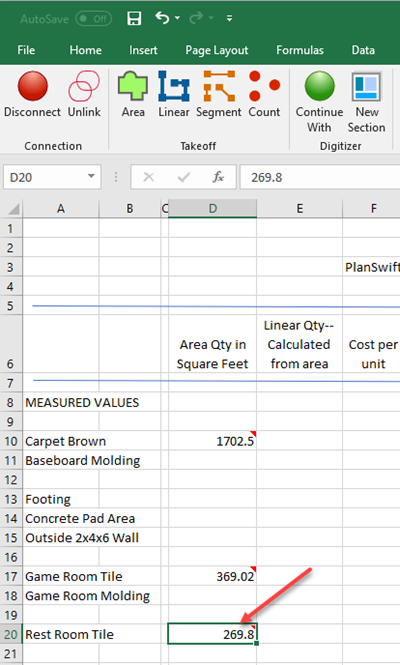
- Click on an active takeoff cell (containing a takeoff value) within your linked Excel spreadsheet to activate these icons
![]()
- Click on either Continue With or New Section
PlanSwift is now ready for you to add to your takeoff. Perform the takeoff in PlanSwift, and the value of the new section will be added to the existing takeoff value in the linked Excel spreadsheet. That added value will also be reflected in PlanSwift. If you make any changes to the takeoffs in PlanSwift, those changes will automatically be reflected in Excel, as long as you remain connected to PlanSwift.
 Initiating Takeoff from Excel Initiating Takeoff from Excel | Excel Integration - Go to Page and Select Existing Item Options  |
Related Articles