
Once the Crystal Reports designer creates the custom report files (rpt and ini), those files must be distributed to all users who will need to run this report (or reports).
Copy Report Files to User’s Computers
Copy the custom report file (*.rpt) and the report configuration file (*.ini) and paste them into the Custom Reports directory (C:\OCS Documents\Quick Bid\CustomReports). When the Quick Bid Reports Dialog box is opened, Quick Bid reads the report configuration files and displays report options.
Both files (*.rpt and *.ini) are required.
- Copy both of these files to each user's computer so they can access/run your Custom Report
The files must be stored in the "CustomReports" folder in the same location that is set as your "Database Folder" in Options. See Related Articles for details on changing your folder locations.
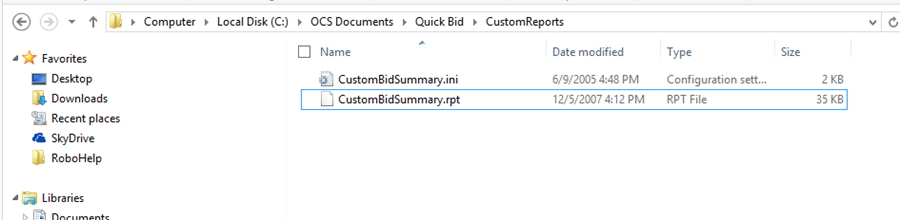
There is a bug in the most recent Quick Bid installers where the folder created in OCS Documents\Quick Bid\ is named "Custom Reports" instead of "CustomReports". Remove the space so Quick Bid can locate your custom report files.
Add from Report Library
After you copy the report files to the user's computer, to get your custom Report(s) to show up in the Quick Bid Bid Reports dialog box, you need to add the Reports from the Report Library.
- Open the Bid Reports dialog and click on the Report Library button.
![]()
In the Reports Library window,
- Select the custom report in the right side
- Click the add button to move it to the active reports window
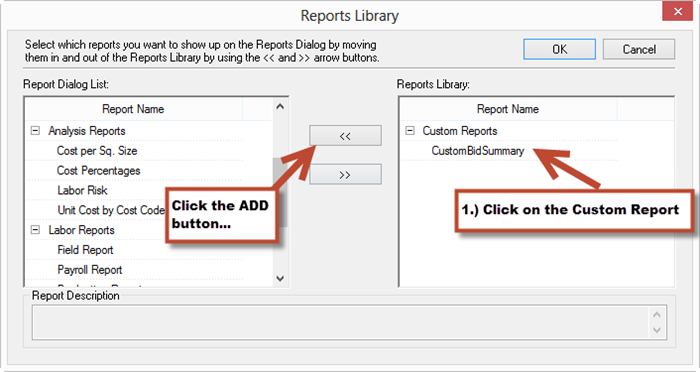
The custom report(s) become visible in the Bid Reports screen.

 Creating Custom Reports in Crystal Reports Creating Custom Reports in Crystal Reports | Printing and Exporting the Bids, Equipment, Other, Subs, Markup Materials, Labor, and Payroll Tabs  |
Related Articles