
Context-menus appear when you right-click (or, more correctly, 'alternate-click' for all our left-handed users out there) on something. Depending on where the right-click occurs, different options are presented.
Options only available on the Image Window Context Menu are explained below (we won’t explain the basics like copy, cut, paste, etc.).
Available options change depending on where the right-click occurs (on a piece of takeoff, on a Typical Group Frame or Marker, on a Named View or other piece of Annotation, or in a blank-space, etc.).
Takeoff Object Details
Not exactly a Context Menu, but when you select a single takeoff object, hovering over that object displays a small pop-up with details of the object such as Condition Number and Name, Quantity Results, and the assigned Bid/Typical Area.

The pop-up includes information for a single piece of takeoff.
Image Window Context Menus
The Image Window Context Menu changes a little depending on where the user actually clicks. Different options are shown/available if the user clicks on a blank part of the screen, on a takeoff object (or objects), or on an annotation.
Most options on the Context Menus

This graphic shows all available options, the Context Menu you see will not look exactly like this.
Let's see what each option does.
| Option | What it does/How it is used... |
|---|---|
| Align Grid | When you right-click on a piece of Area takeoff with a grid, allows user to align the grid to the plans for a more accurate measurement. |
| Set Length... | When you right-click on a piece of Linear takeoff, the user can set an advanced property that will allow the user to manually enter in the length of a takeoff object. |
| Set as Curved Segment | When you right-click on a piece of Linear takeoff, the user can set a segment as Curved which will add a control handle to the center of the linear object so the user can drag it to make an arc. |
| Set as 3-Point Curved Segment | When you right-click on a piece of Linear takeoff, the user can set a segment as 3-Point (Bezier) Curved Segment which will add a control handle to the center of the linear object so the user can adjust the end points and the middle point to create a parabolic curve. |
| Assign to Current Area | Assigns the selected takeoff object(s) to the area currently selected in the Area drop down on the Settings toolbar. |
| Count as Negative Quantity | When you right-click on takeoff, you can set it to count as negative (reducing total takeoff quantity). These items are shown with a negative sign  - see Negative Takeoff for important information about how this function works. - see Negative Takeoff for important information about how this function works. |
| Set Typical Group Marker Count | When you right-click on a Typical Group Marker, you can select how many Markers to place at this exact location to multiply the totals quickly (you can always come back and move the markers around the Page to match the Plan). |
| Change Color > | When you right-click on a shape annotation object (lines, arrows, clouds, etc.), you can adjust its color from the color-picker. |
| Change Line Width > | When you right-click on a shape annotation object (lines, arrows, clouds, etc.), you can adjust its line-thickness from a preset list of pixel thicknesses. |
| Tools > | Opens a sub-menu providing access to all the tools on the Tools and Annotations toolbars |
| Zoom > | Opens a sub-menu providing access to all the options on the Zoom toolbar |
| Rotate/Flip > | Opens a sub-menu providing access to all the tools on the Rotate, Flip, Adjust Image/Plan Toolbar and the Rotate/Flip (Takeoff) Toolbar. |
| Overlay > | Opens a sub-menu providing access to all the tools on the Overlay toolbar |
| Reassign Condition > | When like takeoff objects are selected (all of the same Style), opens a pick-list where you can select a different Condition (of the same Style) to which the objects can be reassigned. Available starting in v.4.00.00. See Reassigning Takeoff from One Condition to Another Existing Condition for more information. |
| New Comment | Adds a new Comment icon where the right-click occurs and opens the (new) Comment dialog box, see Project Comments Overview for more information. |
| Copy/Paste Backouts | When you right-click on an Area Backout(s), you can copy and paste it to another Area takeoff object (or within the same one). |
| Copy Current View | Copies the current Image Window contents for pasting into an external document or e-mail. |
| Rename Page... | Allows you to rename the current page without opening the Cover Sheet. |
| Delete Page | Allows you to delete the current page without opening the Cover Sheet. Deleting a Page deletes all objects on the page including takeoff and annotations.
Deleting a page removes it entirely from the project including the Base Bid any Alternate or Change Order in this Project. Deleting a Page cannot be 'undone' and you will lose anything on that Page, in the Base Bid and all Child Bids immediately and permanently. |
| Select All Image Legend Objects | Selects all Image Legend objects on the current page. Useful if the user has moved various Image Legend objects to different areas of the page. |
| Filter Image Legend to Active Areas | Hides Image Legend objects for Conditions not used in the currently active Bid Area (as shown in the Bid Area drop-down). Affects printing. |
| Reset Image Legend | Restores original formatting and placement of the current page's Image Legend. |
| Group Image Legend | Sets the Image Legend so that individual objects cannot be individually resized or moved. The Image Legend operates as a single component and will have a solid, opaque white background. |
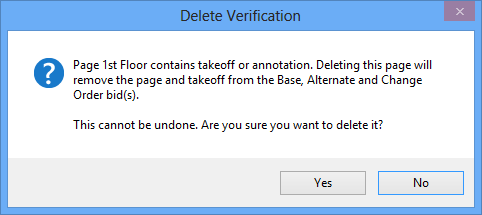
 Image Window Image Window | Takeoff Tab Toolbars Overview  |
Related Articles