
You can send a copy of your Job to another PlanSwift user.
Email a Job
- Click the Email Job button on the Home ribbon bar

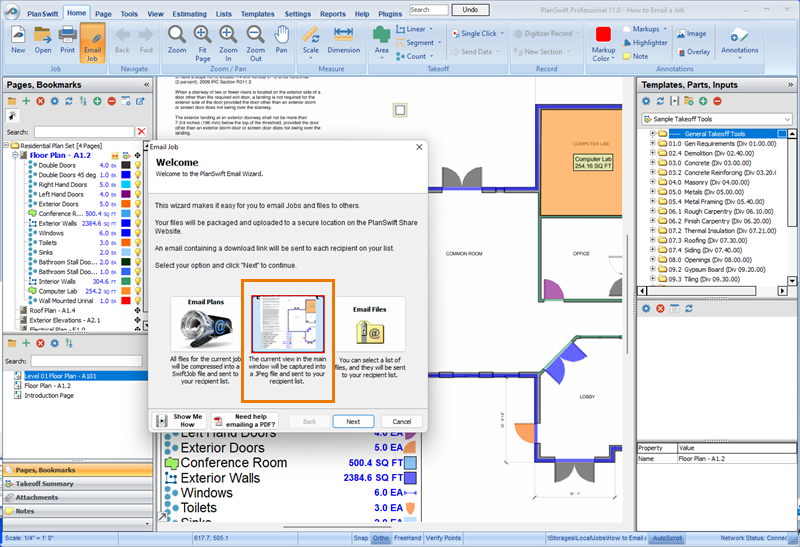
This opens the Email Job dialog box.

There are three options:
Email Plans
To email Plans to another user,
- Select Email Plans (default selection)
- Click Next

In this screen,
- Choose what you want to send - click Select All to select/deselect all Plans.
- Pages (the Plans/Images in your Job)
- Takeoff
- RememberValues
- AutoLists
- Links (bookmarks/links you created)
- Attachments
- Click Next
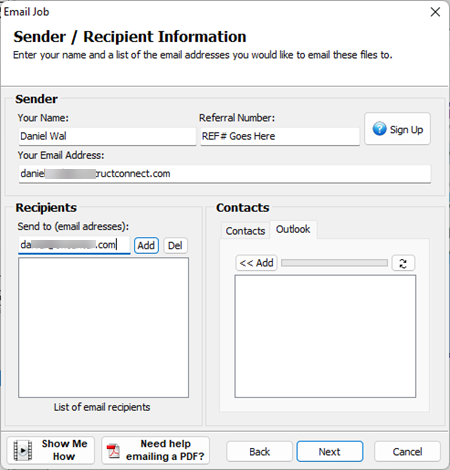
- Enter your information as Sender
- Add e-mail address in the left box (Recipients) or select from your Contacts list in the right box to select to whom you want to send this project
- Click Next

- Add an outgoing Message
- Click Next

- Review your outgoing email
- Click Finish

PlanSwift creates a compressed file to send to your recipients.
In the bottom-right corner of your Windows Desktop, above your notifications/icons, you’ll see sending progress.

When the upload is complete, you’ll see a confirmation similar to this:

If you change your mind and don’t want the recipients to download the file, click the “To delete this file…” link right away, otherwise, your uploaded job file will be available for 30 days. If the recipient hasn’t downloaded it by then, you’ll have to resend.
This is what the email your recipient(s) receive looks like:

To download, your recipients simply click on the Download link in the e-mail.
If one or more recipient isn’t already a PlanSwift user, they can download a trial and review your project right away.
Email Screenshot
If you select Email Screenshot, PlanSwift takes a screenshot of your current Plan (with the takeoff and the legend).
The screenshot does not include the rest of the application such as the side panels, menu ribbon, or status bar.
- Click Next
You’re presented with a preview of the actual screenshot that will be sent.

- Click Next
- Fill in Sender and Recipient information

- Click Next
- Enter in a Message

- Click Next
- Review your email before sending

- Click Finish if everything looks good.
Your recipient receive the actual jpg file attached to the e-mail with a link to download it if their e-mail application blocks the jpg. All they need to do is click on the link in the email and save the jpg to their computer to review it.

Email Files
You can email any files to another PlanSwift user, such as Reports, Plans, or Exports.
- Click Email Files

- Click Next
- In the Select Files to Send dialog box, click “Add Files…”
- Browse to wherever the file(s) you want to share is stored

- Click Open
- Follow the instructions to address and send your files
Your recipient(s) receive an email with a link to download whatever files you included.
Because you can theoretically send any size file through the system, files are not attached to the email itself, just the link to download the file(s).

 Merge Two Jobs Merge Two Jobs | Sharing a Job with Anyone by Printing Plans with Takeoff as PDFs  |
Related Articles