

From within the Templates tab, you can create new parts for use in estimating and takeoff before you need them; you can also export/import them into jobs.
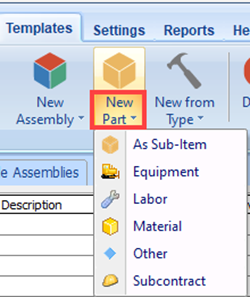
- To create a new part, select the New Part button;
- Click the lower half of the button to create: a Sub-Item or to choose Equipment, Labor, Material, Other, or Subcontract Item.
- The Form properties window allows you to name your part and set the cost and markup.
- When finished, click the OK button to continue; you have now created a new part for your use.

- The Advanced Parts option allows you to enter, set, and update more options.
- Select the Advanced button to open the Properties window.
- Padlock - Allows you to lock and unlock the contents of that row. Clicking on the lock toggles the setting.
- Light bulb - Indicates if the row is visible or not.
- Yellow Bulb - Row visible.
- Gray Bulb - Row not visible.
- When done, click the OK button to continue; you have now created a new part for your use.
Watch a video on how to create a basic Part:
 New Assembly or Sub-Item Assembly New Assembly or Sub-Item Assembly | Columns Button  |
Related Articles