
You can set up an Area Takeoff Item to factor in slope. The program calculates all Results (surface area perimeter even volume) based on the Takeoff Item's Slope and the direction of the sloped takeoff.
Set up your Takeoff Item to Factor in Slope
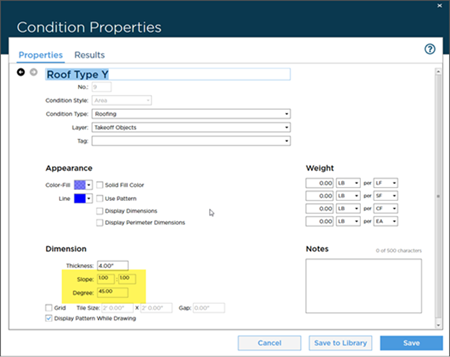
To draw sloped Area takeoff you first set up your Takeoff Item to accommodate that slope by entering Rise:Run or Degree in the Area's Takeoff Item Properties (see Creating an Area Takeoff Item for details on setting up an Area Takeoff Item).
In our example we set a 1:1 (rise:run) which equates to a 45 degree slope (fairly pronounced but it makes our example easier to follow).
Every piece of takeoff drawn with this Takeoff Item is sloped - you cannot slope a single piece of takeoff for a Takeoff Item or "un-slope" a piece of takeoff drawn with a Takeoff Item set to slope. If you are taking off an area that includes sloped and level regions you must create duplicate Takeoff Items - one sloped and one not - and then combine the Results on the Summary or Worksheet Tabs.
Drawing Sloped Area Takeoff and Adjusting Slope Direction
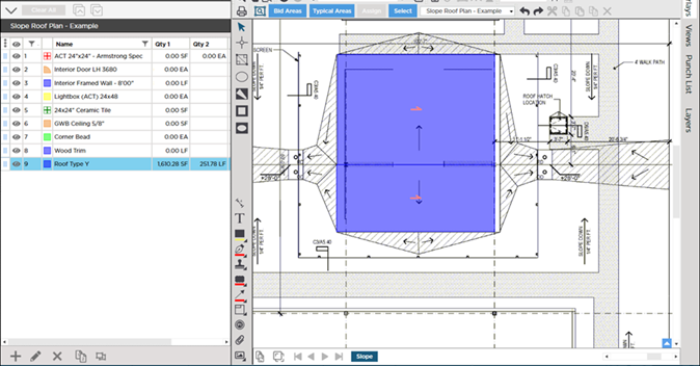
Any area you takeoff you draw with a Takeoff Item set to "sloped" is sloped however you must be mindful of the different sections of an area that may be sloped in different directions. Looking at the example plan below we can see there are two sections one runs north the other south. We cannot takeoff this as one big object - we have to takeoff each sloped area separately so we can set the direction of each independently.

We draw each section separately. By default the program draws all sloped takeoff with the slope running toward the right (you can tell by the light half-arrow indicator in the screenshot) - in our example this is not correct.
Right-click on each section one at a time and the rotate control shows. Use this rotation control to adjust the direction of slope to match the plan.
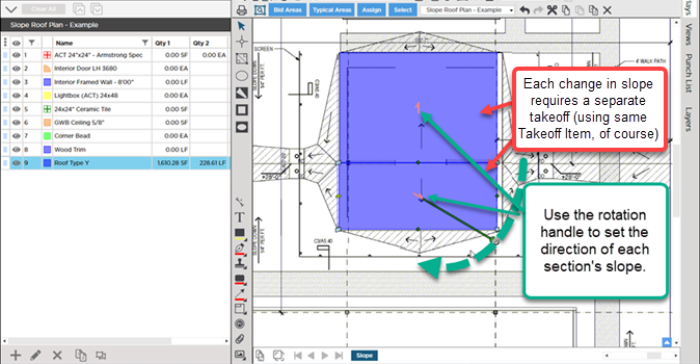
Notice that although the Area (SF) result does not change the perimeter result does based on the new direction.
Birds' Eye vs. Calculated/Perpendicular View
By default sloped Area takeoff is displayed from a birds' eye point of view of the object. You can toggle between that birds' eye view and what the program is calculating (we call this the 'perpendicular view') by selecting an object and pressing "G".
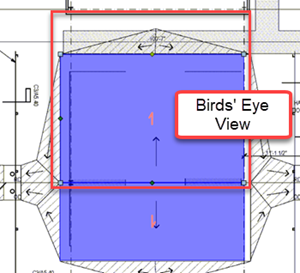
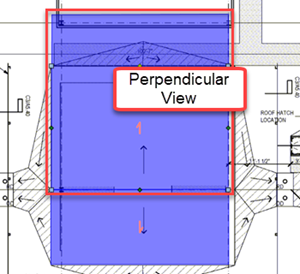
The perpendicular view shows you the calculated shape of the area takeoff (if you were parallel with the object itself) - exactly how the program is calculating Results.
Before drawing any takeoff you must set and verify Scale see Related Articles.
 Auto-filling Backouts with Other Takeoff Items Auto-filling Backouts with Other Takeoff Items | Drawing Count Takeoff  |
Related Articles