
Welcome to On-Screen Takeoff!
Our goal with these Getting Started articles is to get you working in On-Screen Takeoff fast. We don’t intend to cover every feature or function in the application - that’s what the User Guide is for - we want to get you comfortable and confident so you see REAL VALUE immediately.
So, after installing and launching, the very first thing you need to do is Create A Project, which is super easy and with Takeoff Boost™’s suite of AI-Powered tools, you’ll be up and running in minutes.
Step 1 - Open On-Screen Takeoff (if it it isn’t running)
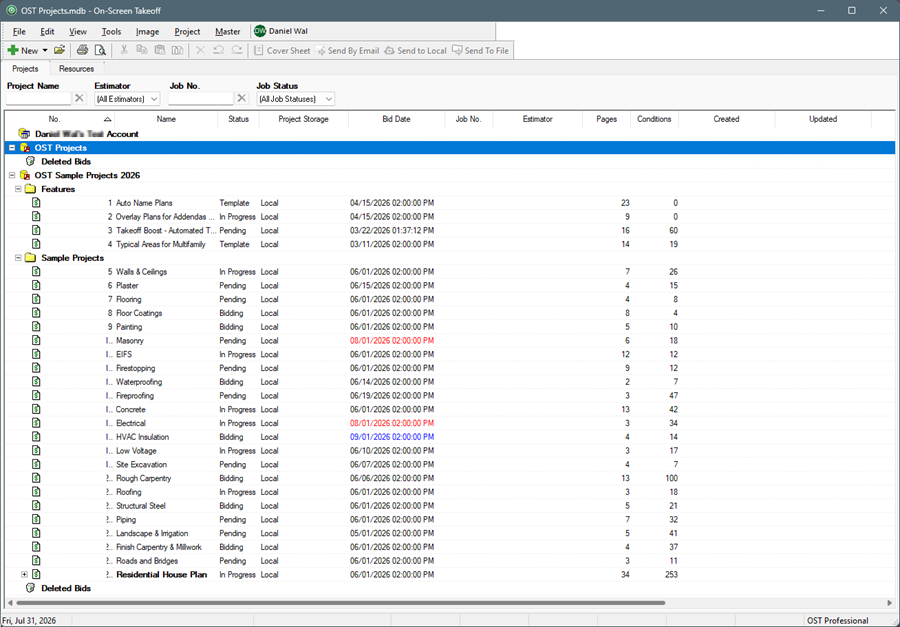
By default, when you install On-Screen Takeoff, there are two database set up for you - one is “Sample Projects” which walks you through all sorts of great onboarding resources. The other is a blank database named “OST Projects” - go ahead and make sure that one is selected.
(That top “database” is your CloudSync storage, we’ll ignore that for now.)
Step 2 - Create a New Project
- Click the New button toward the top of the application, the Cover Sheet opens - see On-Screen Takeoff - 03.02 Creating a New Takeoff Project (Bid, Job) for detailed instructions
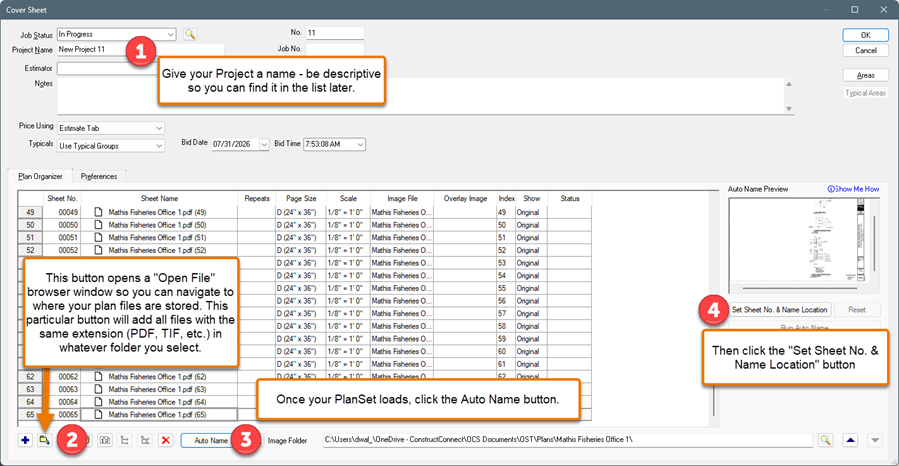
- Name your project
- Click the Auto Add button and browse to where your image files/plans are stored (On-Screen Takeoff only links to those files, it does not create copies of them or move them)
Step 3 - Run Auto Name
- Click the Auto Name button at the bottom of the Cover Sheet, the Auto Name panel opens on the right side of the Cover Sheet (this can take a few moments)
- Then click the “Set Sheet No. & Name Location” button in the Auto Name panel - see On-Screen Takeoff - 03.08 Using Auto Name to Speed Up Bid Setup for details on using Auto Name
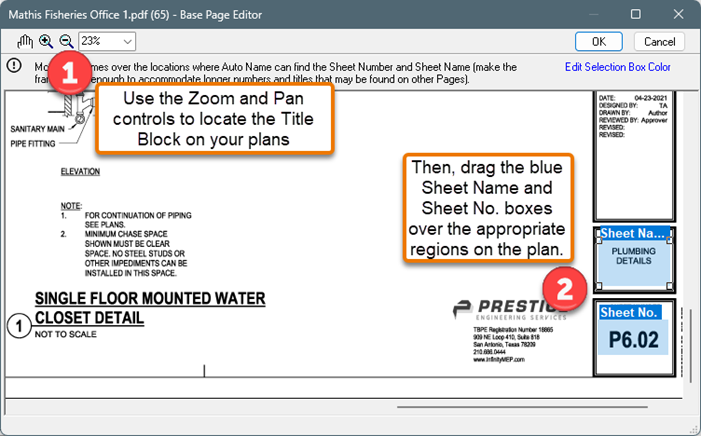
When Auto Name is done,
- Click the OK button on the Cover Sheet to save your Project
When your save a Project for the first time, the Takeoff Tab opens automatically for you, to the first Page in the Project. See On-Screen Takeoff - 04.00 A Detailed Look at The Takeoff Tab for a wealth of information about the Takeoff Tab, which is where you will spend a lot of time when you’re using On-Screen Takeoff.
Step 4 - Run Auto Link
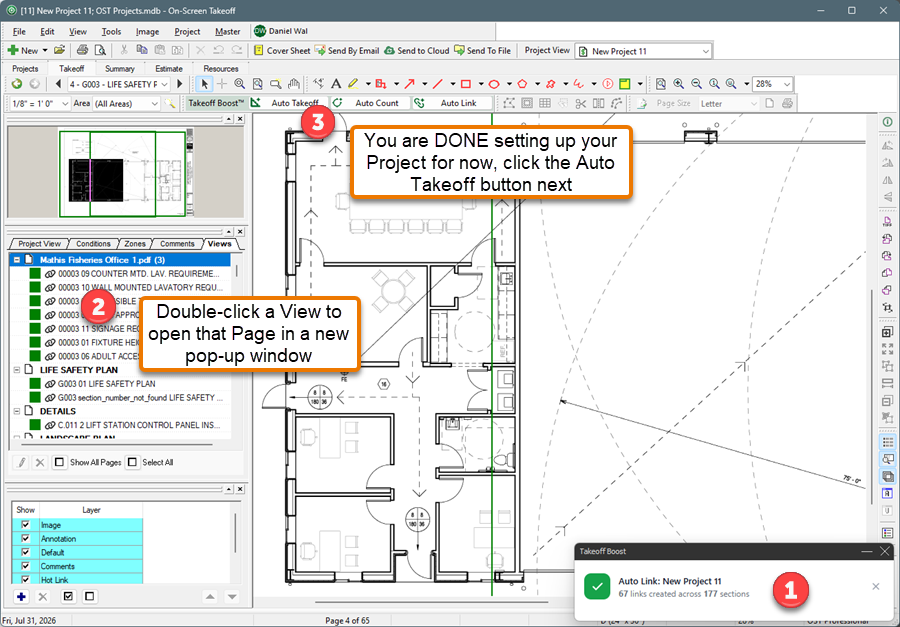
On the Takeoff Tab, there’s a Takeoff Boost toolbar that includes Auto Takeoff, Auto Count, and Auto Link.
- Click the Auto Link button
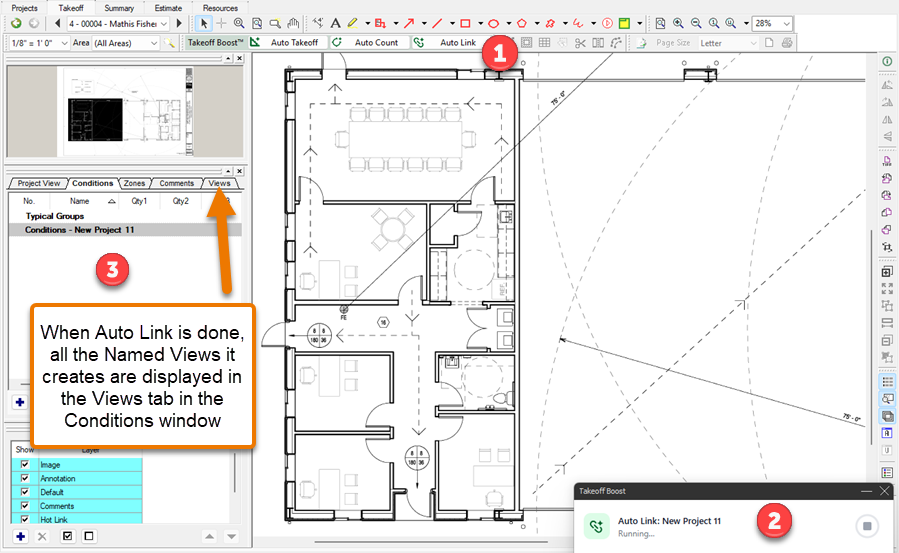
Auto Link scans your plan set and creates navigation links between callouts and the detail pages they reference. It runs in the background and takes a few minutes, but it saves hours, if not days of manual linking.
DONE!
Now that you have your Project Created:
Create Your First Takeoff in On-Screen Takeoff in Under 5 Minutes