
The Project Intelligence Project Details Page is available to paid subscribers and includes a summary of all available information about a project to help you make an informed decision, including the Project Header (enabling you to add a project by status to your Bid Center), Events (i.e., Bid Dates), Details, Documents, Location, and Description. It also includes relevant Contacts associated with that project as well as the Trades needed. Here, you can share projects with team members or preferred vendors (CCPI Professional subscribers only), and General Contractor subscribers will also have an opportunity to click on Add as Bidder to be added to projects they are interested in but for which they have not yet been assigned.

More detail about each section of the Project Details Page is outlined below:
Project Header
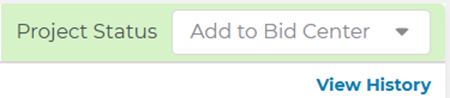
The Project Header includes the Project Name, Watch List Indicator, Project Status, Last Updated Time, and View History.

More information about each of these fields is outlined below:
| Value | Description |
|---|---|
| Project Name | Full name of the project. |
| Project Status | This maps to the Bid Center status for a project. Here you can also add a project to your Bid Center. |
| Watch List Indicator | Indicates if a project is on your watch list. Click on the star to add or remove a project from your Watch List. |
| Last Updated Time | The date and time of the most recent significant update to the project. |
| View History | Enables you to view the change history for the project and includes the type of change made, the user that made the change, the date and time of the change, and any notes for the change. |
NOTE: As a paid subscriber, once a Project Intelligence project is added to your Bid Center, you can assign the project to anyone in your company, and add an estimated value or an internal ID.
Events
Events listed here include any pertinent dates for a selected project, such as Bid Date or Project Start and End Date.

Details
The Details section provides the user with more information about a project, specifically:
| Project ID | The ConstructConnect ID for this project. |
| Solicitation # | The agency specific project number for a municipality or state or federal agency, such as the park bench replacement solicitation number 12345 for the Department of Parks. There can be multiple solicitation numbers, each representing separate agencies. |
| Status | The stage of the project, such as GC Bidding or Post Bid. |
| Bid Type | The type of bid for the project, such as Pre-Qual/Invited GC or Bidding as Prime. |
| Sector | The area of work for the project, such as Private. |
| Max Value | The total estimated value of the project. |
| Project Type | The type of project work, such as New Construction. |
| Building Use | The end use of the project, such as Water / Sewer. |
| Set Asides | The percentage of work that is set aside for minority and other special interest concerns. |
| Bonds | The percentage of financial amounts for bonding. |
Associated Documents for a Project
This section provides a high-level summary of the Documents associated with a project (i.e., plans, specifications, addenda), who provided the documents, and any additional notes.
When a project contains documents that are available to view or download, the View/Download Documents and Send to Takeoff buttons will show filled-in text as seen below:

When documents are not available on a project, those same buttons will appear in a lighter shade, with text that is not filled in:

NOTE: When the Document status for a project is Project Details Only, you will instead see details on how to acquire the plan documents under the Details section for the project.
Viewing Project Documents
To access the documents for a project, you can either click View/Download Documents in the Documents section or click on any of the document count numbers in the section. The document viewer will open in a separate window. See New Document Viewer Overview for more information.
Sending Documents to ConstructConnect Takeoff
You can also send a documents to ConstructConnect Takeoff from the project details page in Project Intelligence.
-
From the project details page, click Send To Takeoff.
If you do not see an option to send these documents to takeoff, you may not yet have a ConstructConnect Takeoff account. Contact your Customer Service representative to learn more.
Location
The Location section contains the physical address of the project. Clicking on Show Map opens the project location in a new window using Google Maps™ mapping service.

Description
The Description section contains a text description of the project and scope. When present, clicking Show More at the bottom of the section displays the remaining text of the entry.

Contacts
The Contacts section is divided between All, Design Team, Bidders and Planholders.

The number next to a category represents the total number of contacts for the category. Click the tabs at the top of the section to view the different contact types.
You can also:
-
Use the Quick Search menu to locate contacts quickly.
-
Watch a Company that you see in Contacts (see below).
-
Sort by Name, Email, or Bid Value.
If you find a company that you’d like to follow, you can add it to your company Watch List or tag them as one of your Favorite Companies in your Predict Preferences.
To add the company to your Watch List, click on the star icon which will turn yellow when the company has been added to your list. Also, you’ll know when any of your favorite companies are already attached to a project by checking out the star in their Contact row or card.

Trades
The Trades section lists the trades associated with the project. Click the tabs at the top of the section to switch between viewing All Trades and the trades that align with your selections on the Only My Trades tab. For more information on navigating the Trades section, see Working with Trades and Coverage in Bid Management.
The number next to All or Only My Trades represents the number of trades for that category.

The line for each Division displays the Division Number and the count of Trade Codes for that Division participating in the project.
To see all of the trades for a Division associated with the project, click anywhere on the line for the Division. To expand all Divisions, click Expand All at the top of the section. To locate a specific Division or Trade Code, enter the code for either the Division or Trade in the Quick Search box at the top of the section and press Enter.
Sharing, Downloading, or Hiding Project Information
You can share, print, download, or hide a Project Intelligence project.
To share a project:
-
Click the Share button in the top right corner of the PDP.
-
Enter the email address that you want to send the project to.
-
Add a message (optional).
-
Click Send.
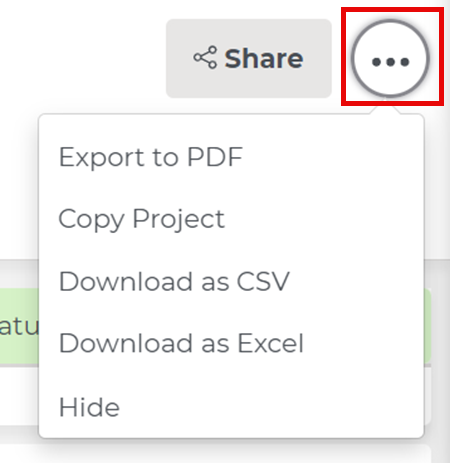
The options under the three-dots button, next to the Share icon, include:
-
Export to PDF
-
Copy Project
-
Download as CSV
-
Download as Excel
-
Hide
To learn more about downloading the Project Details Page as an Excel file here.
Notes
Beneath the Share menu, you will see any Notes added to the project, as described in the table below.
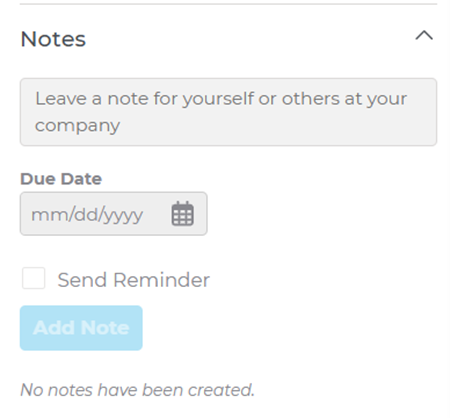
| Notes | Notes for the projects added by you or another member of your company. The number of notes is shown next to the section name. To create a note, enter the note in the box. Click and select a due date. If required, select Send Reminder. This sends a reminder of the note to your email address on the note due date. Click Add Note to complete the task. |
How To Add Yourself/Your Company to Subscription Project
Both trade subcontractors and general contractors can now add themselves to a project from the project details page if they don’t see themselves listed as one of the potential bidders. General contractors will see an Add as Bidder button (shown below), whereas trade contractors will see an Add as Interested button (shown below). Once added, the general contractor or trade contractor can check to see if they are listed as one of the project contacts, as well as add that project to their Bid Center so that they can track its advance through the bid pipeline. To get started using this functionality, see the following section for more details.
Adding a Bidder to a Project
General Contractors who subscribe to Project Intelligence can add themselves to any subscription project by clicking on the Add As Bidder button, either at the top of the Project Details Page above Events or above the Contacts section.


After clicking on the button, a new window will open, revealing a form with almost all the needed information prefilled except for First and Last Name and Phone Number. Add your name and phone number as above, then click Submit.
Add as Bidder flyout - First and Last Name, Phone Number highlighted
After clicking submit, you’ll get an email confirming your request has been received. You will also appear as a Planholder for the project in the list of Contacts associated with the project.
Within two business days, you’ll be notified of your approval status. When approved, you’ll now appear in the Bidders list for the project.
Add as an Interested Party to a Subscription Project
Trade contractors with a Project Intelligence subscription can also add themselves as an interested party of any project by clicking on the Add As Interested button, either at the top of the Project Details Page above the Events or Contacts sections.
Once you click on the Add As Interested button, you will be immediately added to the Contacts table under the Interested Parties tab for the project.
Once you have been successfully added to the Interested Parties tab, you’ll get a confirmation message (shown below).

In case you want to withdraw your name from those interested in the Project, click on the Remove from Interested button to be immediately removed from this list.

Related Articles
Working with Your Search Results in Project Intelligence | Community
Downloading Project Details Page as Excel File in Project Intelligence | Community