
Before drawing any takeoff, set and verify the scale on every page; see Setting Page Scale for more information.
If your Subscription includes Takeoff BOOST™, let Auto Takeoff do much of this work for you: Get Real Results in ConstructConnect Takeoff with Auto Takeoff in Less than 2 Minutes.
Now, you'll use the Condition(s) you created in the previous article to draw the measurements (perform takeoff) on your drawings(plans).
Draw Linear Takeoff
- Select a Linear Condition (1)
- Click on the first point (2)
- Click on the remaining points of the object you want to measure (3, 4, 5, 6)
- At the last point, either double-click or press the ESC on your keyboard to stop performing takeoff (6)
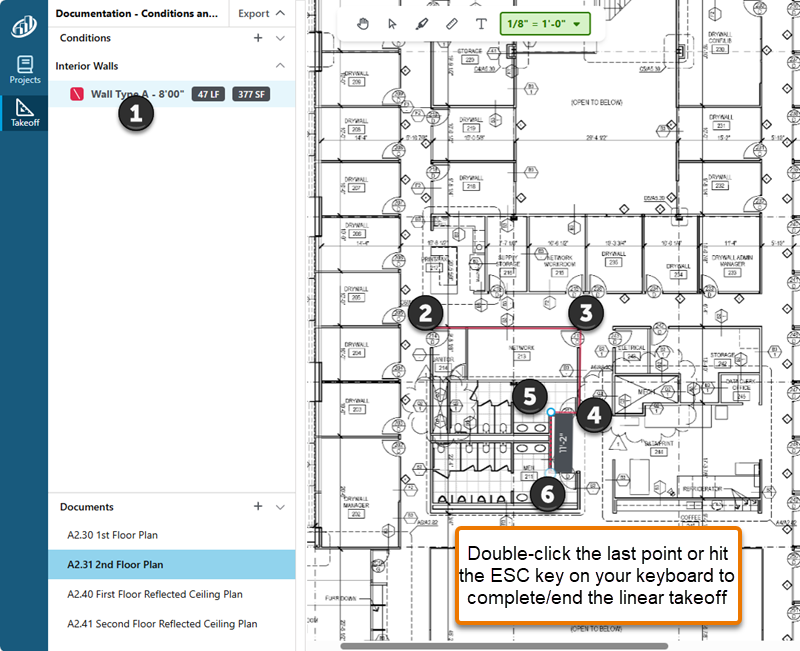
Continue until you’ve taken off all the linear objects you want to measure with this Condition.
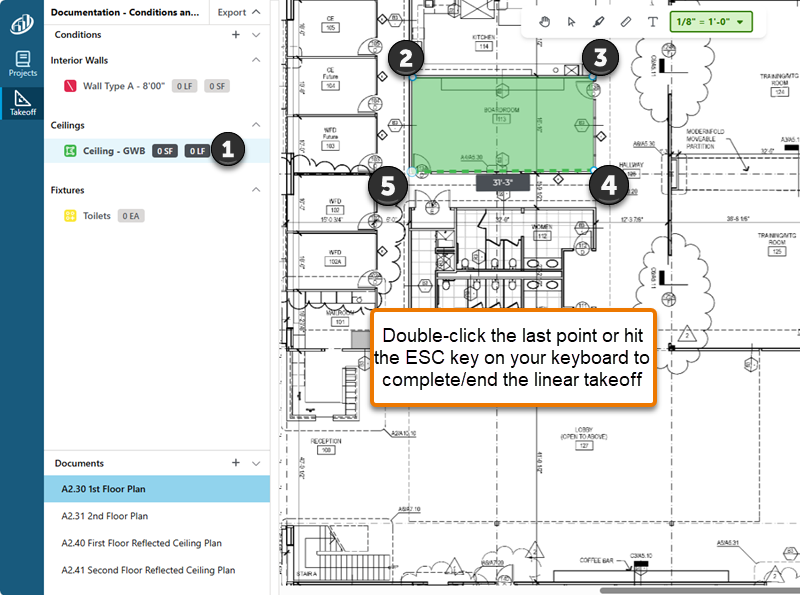
Draw Area Takeoff
- Select an Area Condition (1)
- Click on the first point (corner) (2)
- Click on the remaining points of the object you want to measure (3, 4, 5)
- At the last point, either double-click or press the ESC on your keyboard to stop performing takeoff (5)
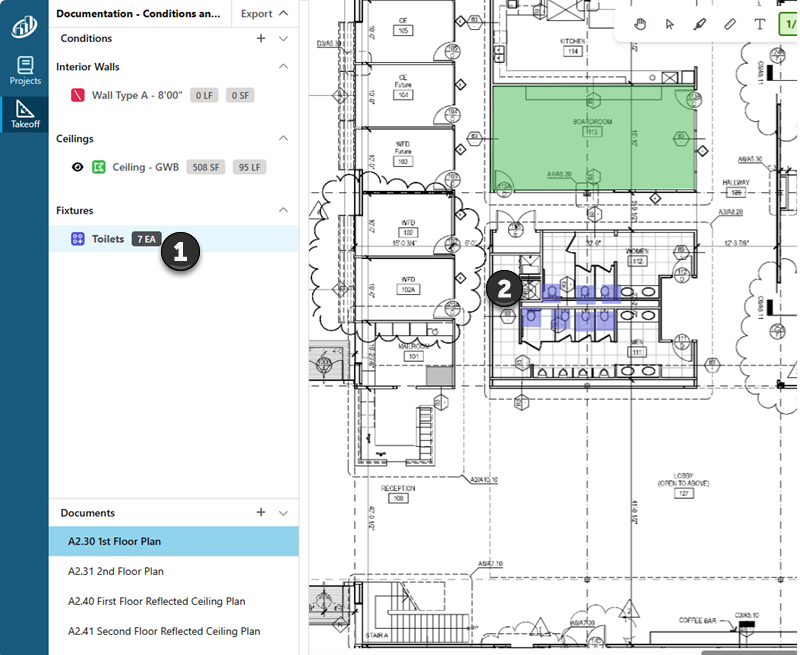
Draw Count Takeoff
- Select a Count Condition (1)
- Click on each object you want to measure (2)
Showing and Hiding a Condition’s Takeoff
In the Condition List, when you hover over a Condition, a button displays that allows you to show or hide a Condition’s takeoff. This is helpful if you are performing takeoff for many Conditions on the same Page - makes it a easier to see what you are working on.
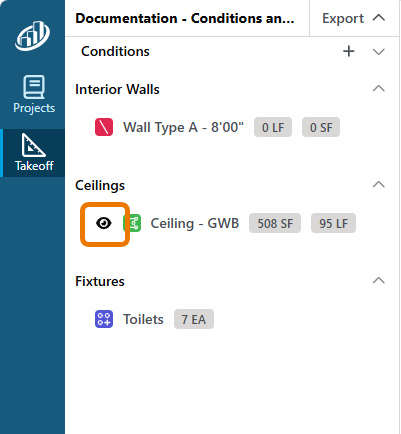
This toggle is reset when you navigate to a different Page.
 Creating a Condition (Takeoff Item) Creating a Condition (Takeoff Item) | Selecting and Editing Takeoff  |